Intro
I recently replaced my Raspberry Pi 3B+ NAS/Media Centre with a Raspberry Pi 4B+ and it occurred to me that others may want to do likewise, so here goes.
Why a Raspberry Pi?
In truth theres a few reasons:
- When I first done this on my Raspberry Pi 3B, I was frustrated by limitations (lack of features, customisation) of my Western Digital WD MyBook Live
- Minimal cost
- To see how viable it was
My experience with my previous NASPi is that it is more than capable for my needs, which I can summarise as:
- Mount multiple external hard drives
- Act as a performant and resilient fileserver for my Windows client devices
- Stream media over UPNP to my TVs, iPhones and iPad
- A lab for me to mess around with linux and play with home automation
To the latter point, if you’ve been reading my blog for a while you’ll know that for a few years my Pi 3B+ also ran Motion to perform motion detection and alerting for my IP cameras.
So why change to a new Pi?
My old Pi was getting a little slow for some tasks, but the main reason was that my external hard drives (mounted via an external 2 drive USB dock) were starting to experience more frequent errors and as I was going to replace them with bigger drives I thought, why not upgrade the Pi hardware too?
What hardware did you opt for?
For my Raspberry Pi, I decided to I wanted to give it as much oomph as possible. My 3B had done incredibly well with its’ 1.2Ghz Quad Core SoC and 1GB Ram but I wanted to boost performance and future proof as much as possible, so I went with the 4B+ with 8GB Ram. Knowing that my old Pi could run a little hot, I also wanted a case with a fan.
In the end, I opted for the CanaKit Raspberry Pi 4 Starter Kit (8GB RAM / 64GB SD) and an upgrade in storage capacity from my 2x 1TB laptop internal SATA drives to 2x WD 2 TB Elements Portable External Hard Drive - USB 3.0.
I’m not running software RAID - a Pi is a little under powered for that, but I do have regularly scheduled rsync runs to mirror files from primary drive to secondary drive and that meets my needs.
One other addition, unplanned, was an RSHTECH Powered USB Hub - I will explain more in a later post in this series why it was needed.
I’m not going to go into an unboxing and hardware build guide - the instructions with the kit were pretty straightforward.
However, I will cover the initial setup of the Operating System on the included MicroSD card.
Setup
Operating System
I’ve opted to use Raspberry Pi OS (formerly Raspbian) using the provided imager too (URL has instructions).
Insert the MicroSD card into your PC or Laptop using either a card reader or a USB adapter.
When you download and run the imager, you’ll see a dialog as below:
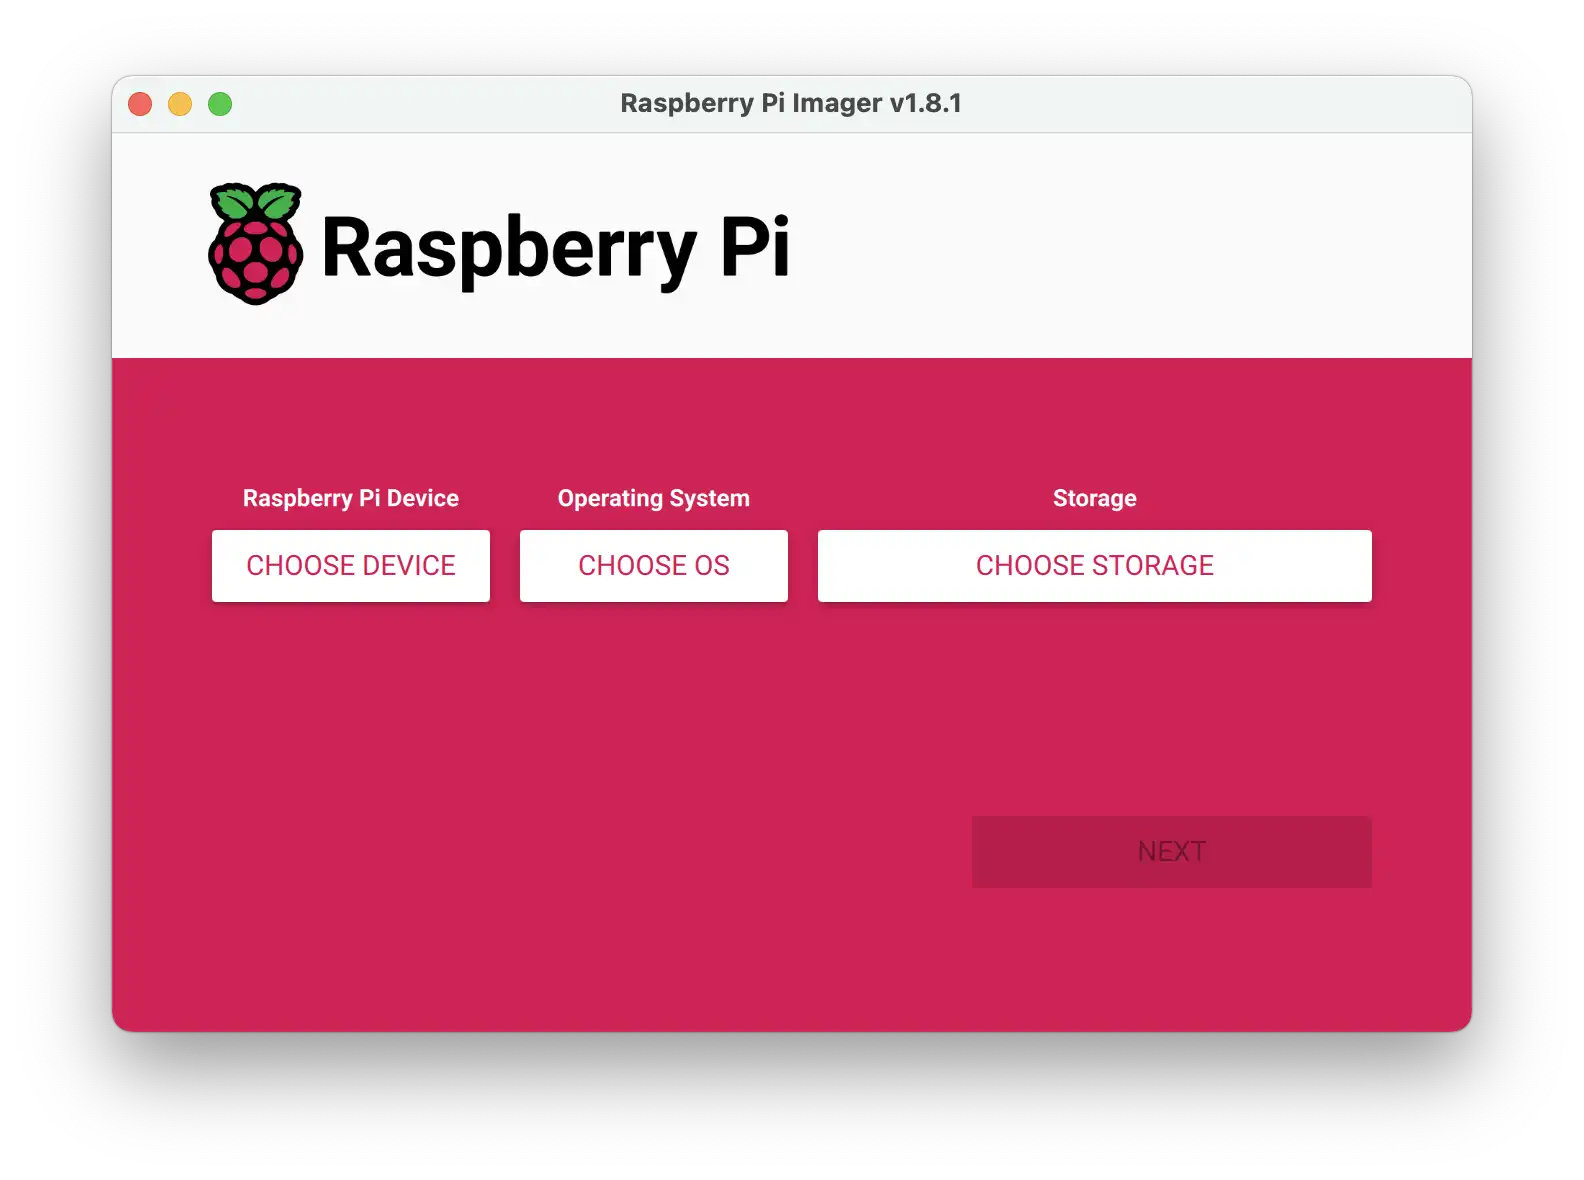
There is also an official video of how to use the installer.
I’ve chosen the Raspberry Pi OS Lite version as this intended to be a headless install - that is to say that it won’t have a graphical user interface and won’t be connected to a display - therefore installing those modules adds unnecessary bloat to the OS install, uses more space and introduces more risks in terms of security vulnerabilites. Any software can have vulnerabilities of course, so why have any software installed that you don’t need and will not use?
Once you’ve imaged the SD card with the OS, eject and re-insert it.
In Windows explorer, navigate to the boot partition of the card, and create a text file simply called ssh.
The file should be empty - simply the presence of this file indicates to the OS that the SSH service should be started on boot.
In addition, though I used a wired ethernet connection to my network, you may want to use WiFi (though I would recommend Wired over Wireless for performance and reliability if using this as a streaming media centre device).
To do so, edit the file in the boot partition titled wpa_supplicant.conf as follows (if it doesn’t exist, create a text file of the same name):
country=uk
update_config=1
ctrl_interface=/var/run/wpa_supplicant

network={
 scan_ssid=1
 ssid="MyNetworkSSID"
 psk="Pa55w0rd1234"
}
In the above, the ssid value should be the name (SSID) of your wifi network, and psk value should be the wifi password.
Once you’ve imaged the memory card with your OS, you can insert it into the Raspberry pi, connect it to power and turn it on.
By default, there is one user on the OS image, pi, with a password of raspberry.
Obviously this is insecure but lets go with this for now to check we can connect to the raspberry pi.
You can get the IP address of the Pi from your ISP router or own personal router - I won’t cover that here before there are so many variations in management user interfaces across various manufacturers.
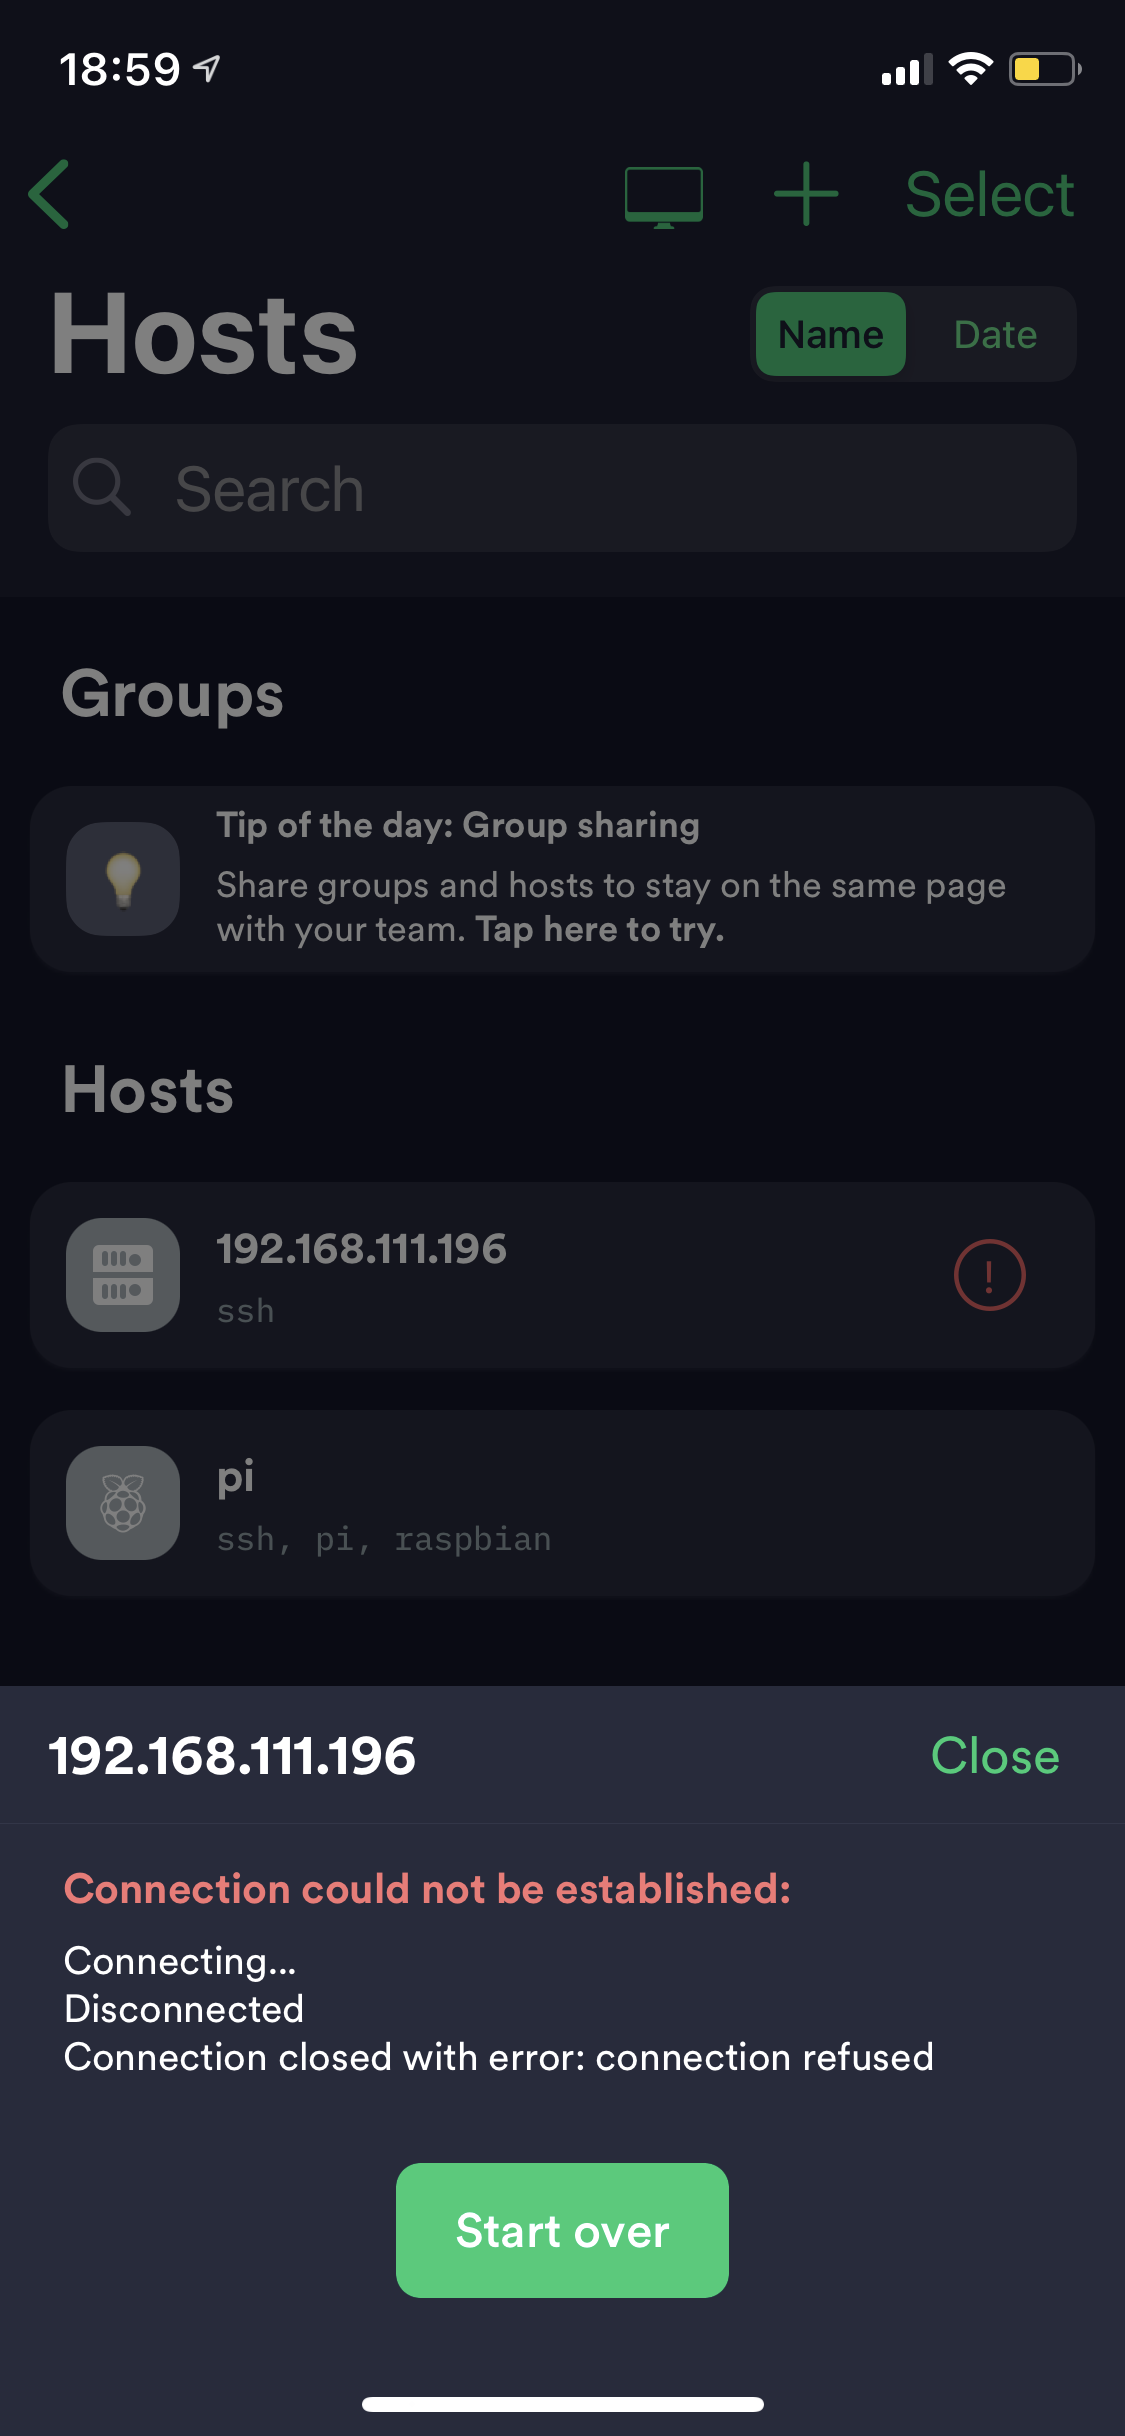
If you haven’t enabled ssh, you will see an error similar to below:
If you have enabled ssh, you will see a message like below (exact format may vary depending upon the SSH client you are using)
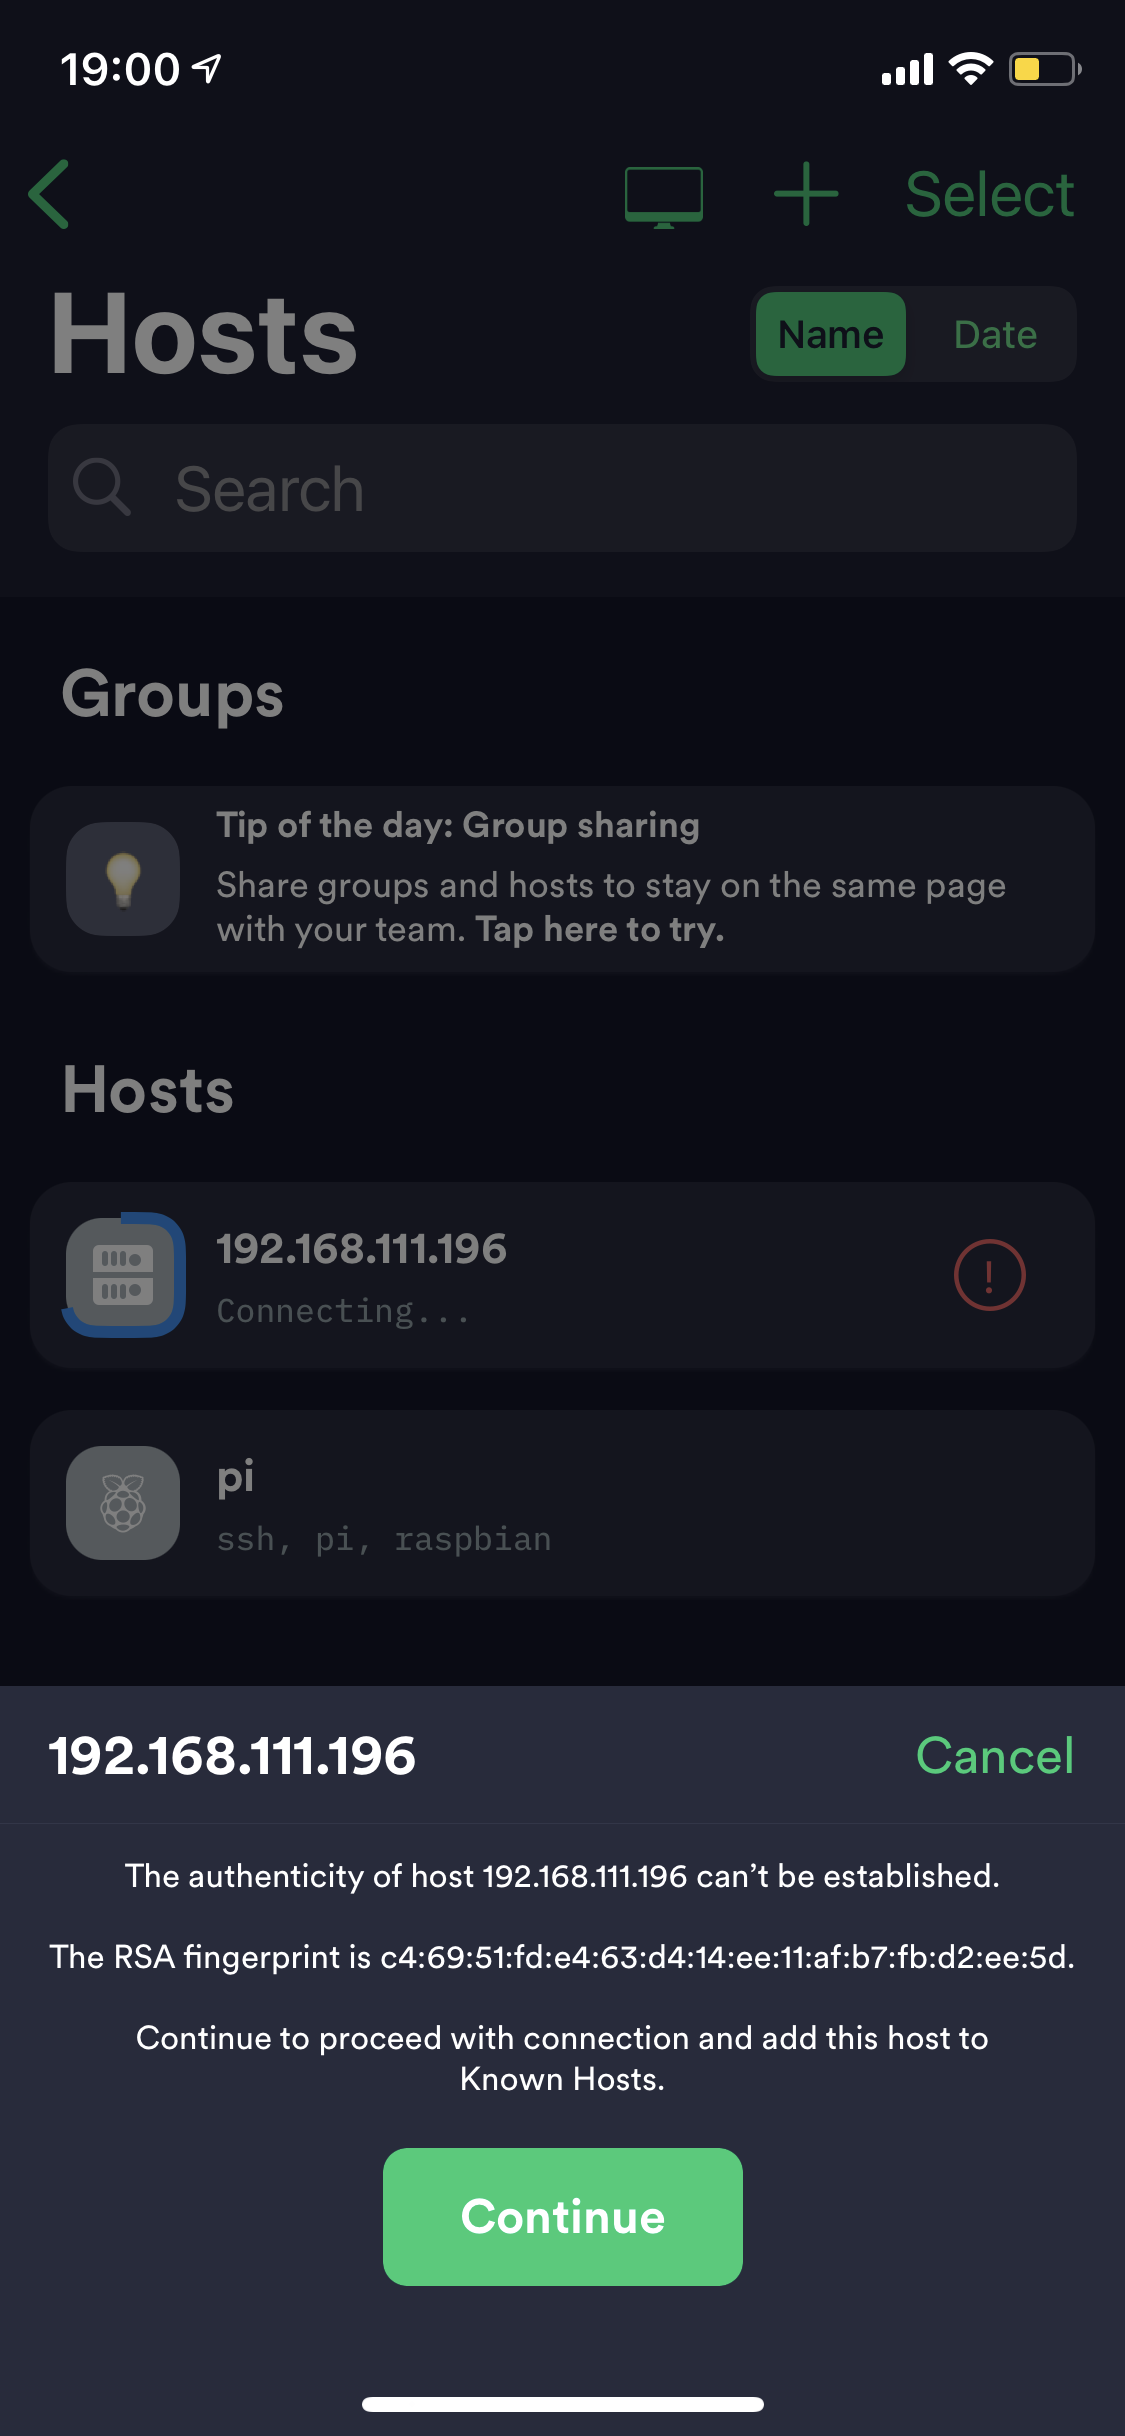
Either click continue or in most clients, type in yes.
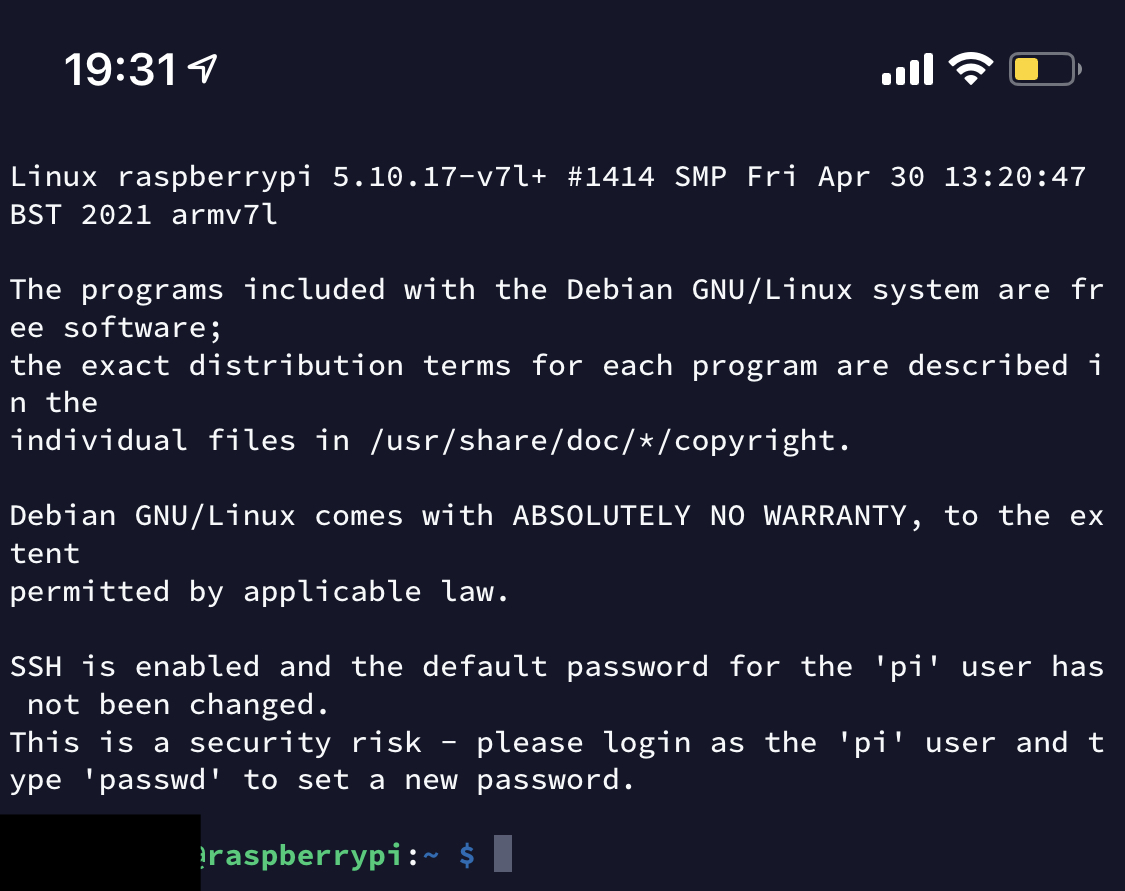
When prompted to enter a username and password, use the default details above, you will see similar to the following:
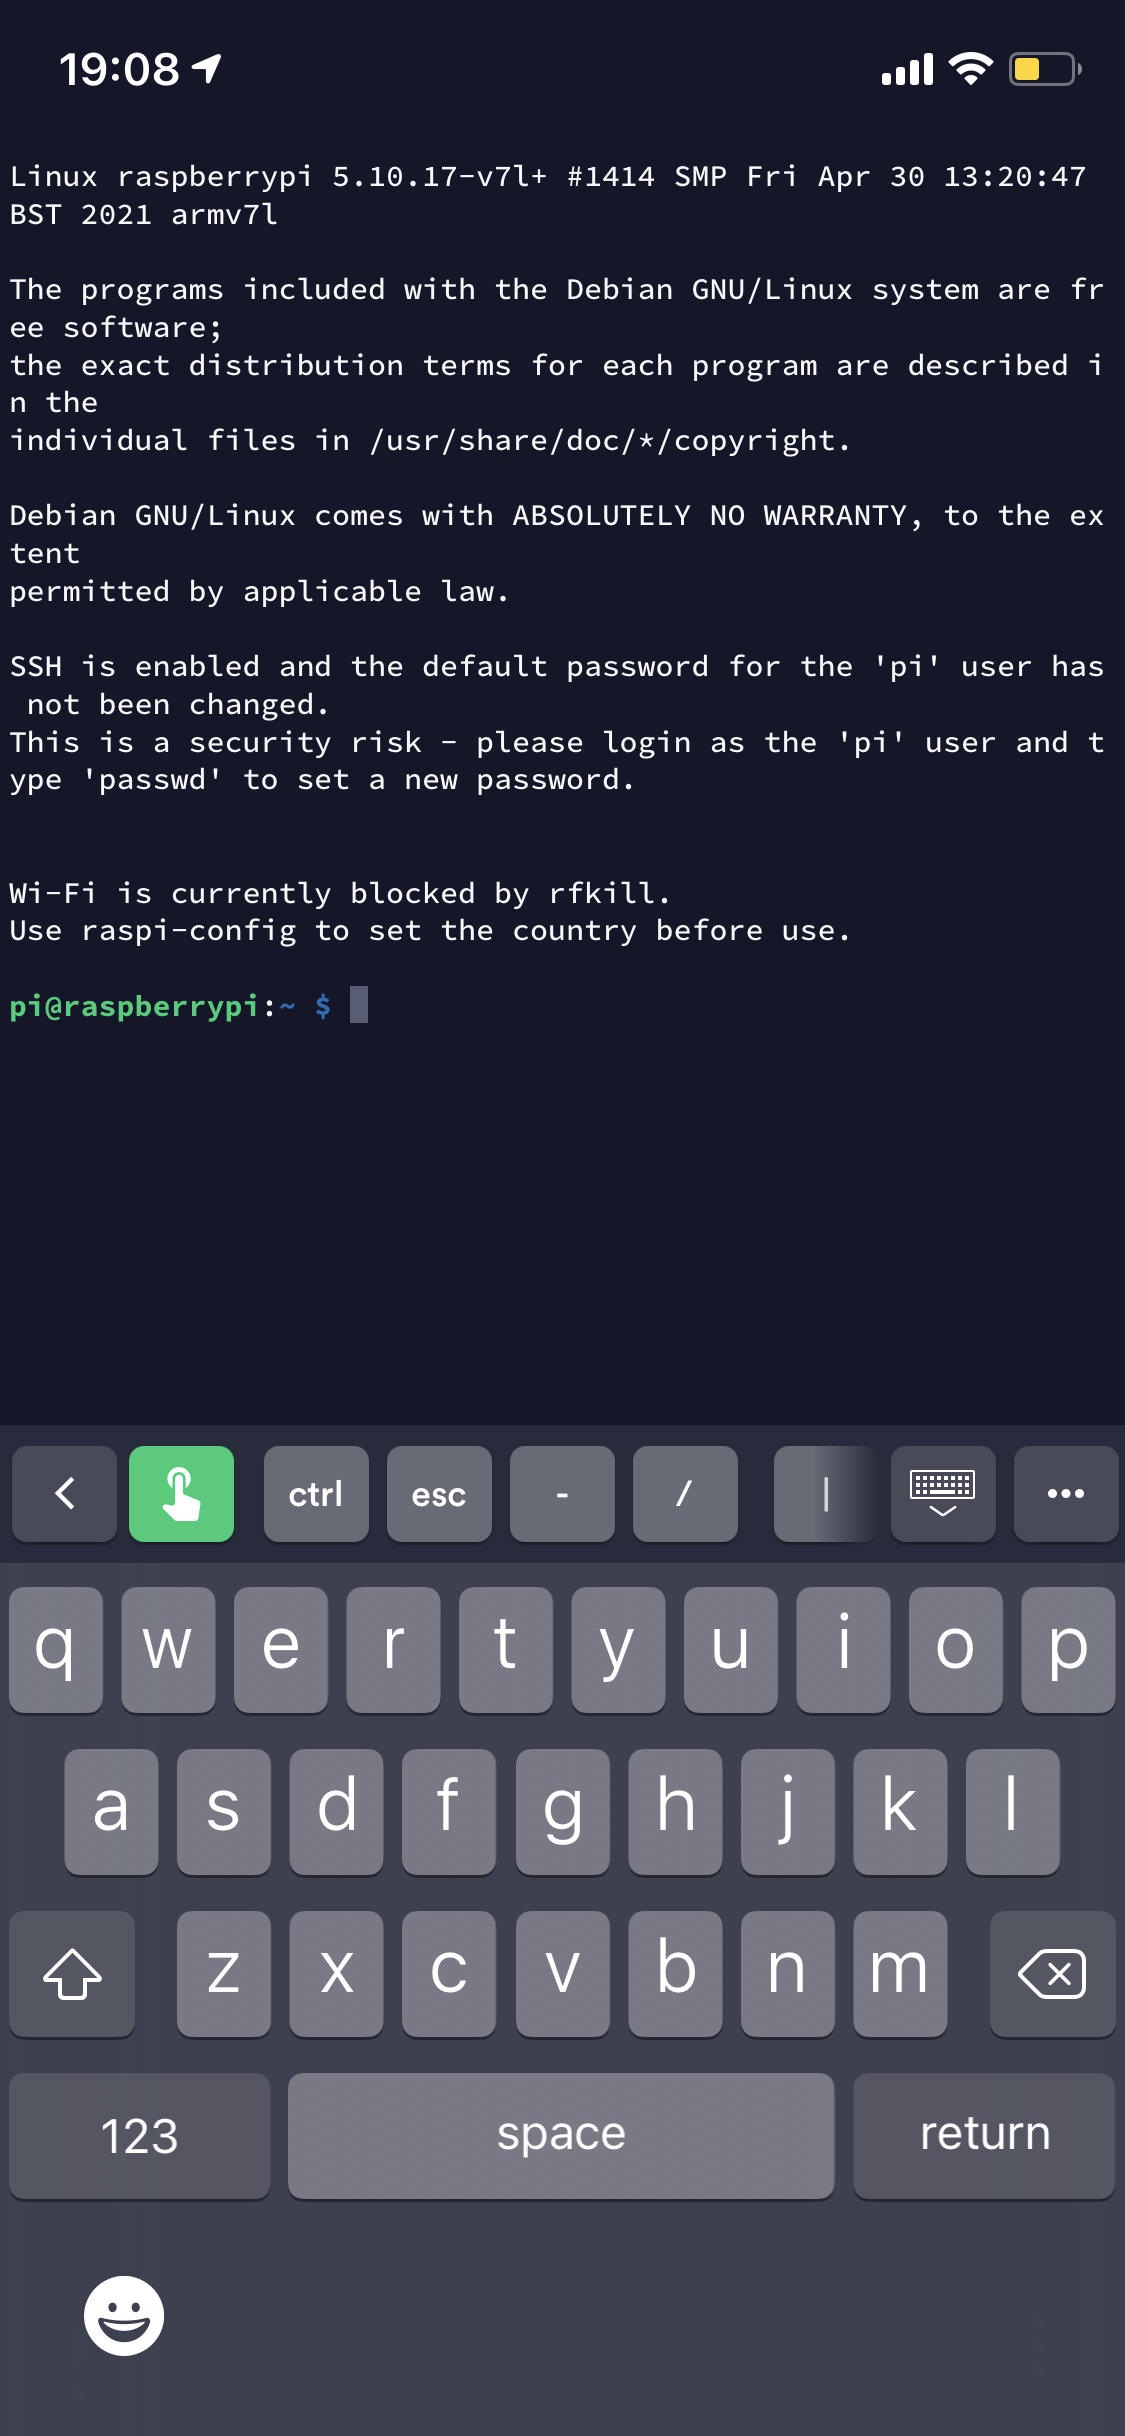
Once logged in, you will see a warning that you are using a default usrename and password:
So, first things first, lets create a new user by entering:
sudo useradd myuser /bin/bash -m -G adm,sudo = replacing myuser with the username you want.
When prompted, enter a password, press enter, then enter the same password again, and press enter.
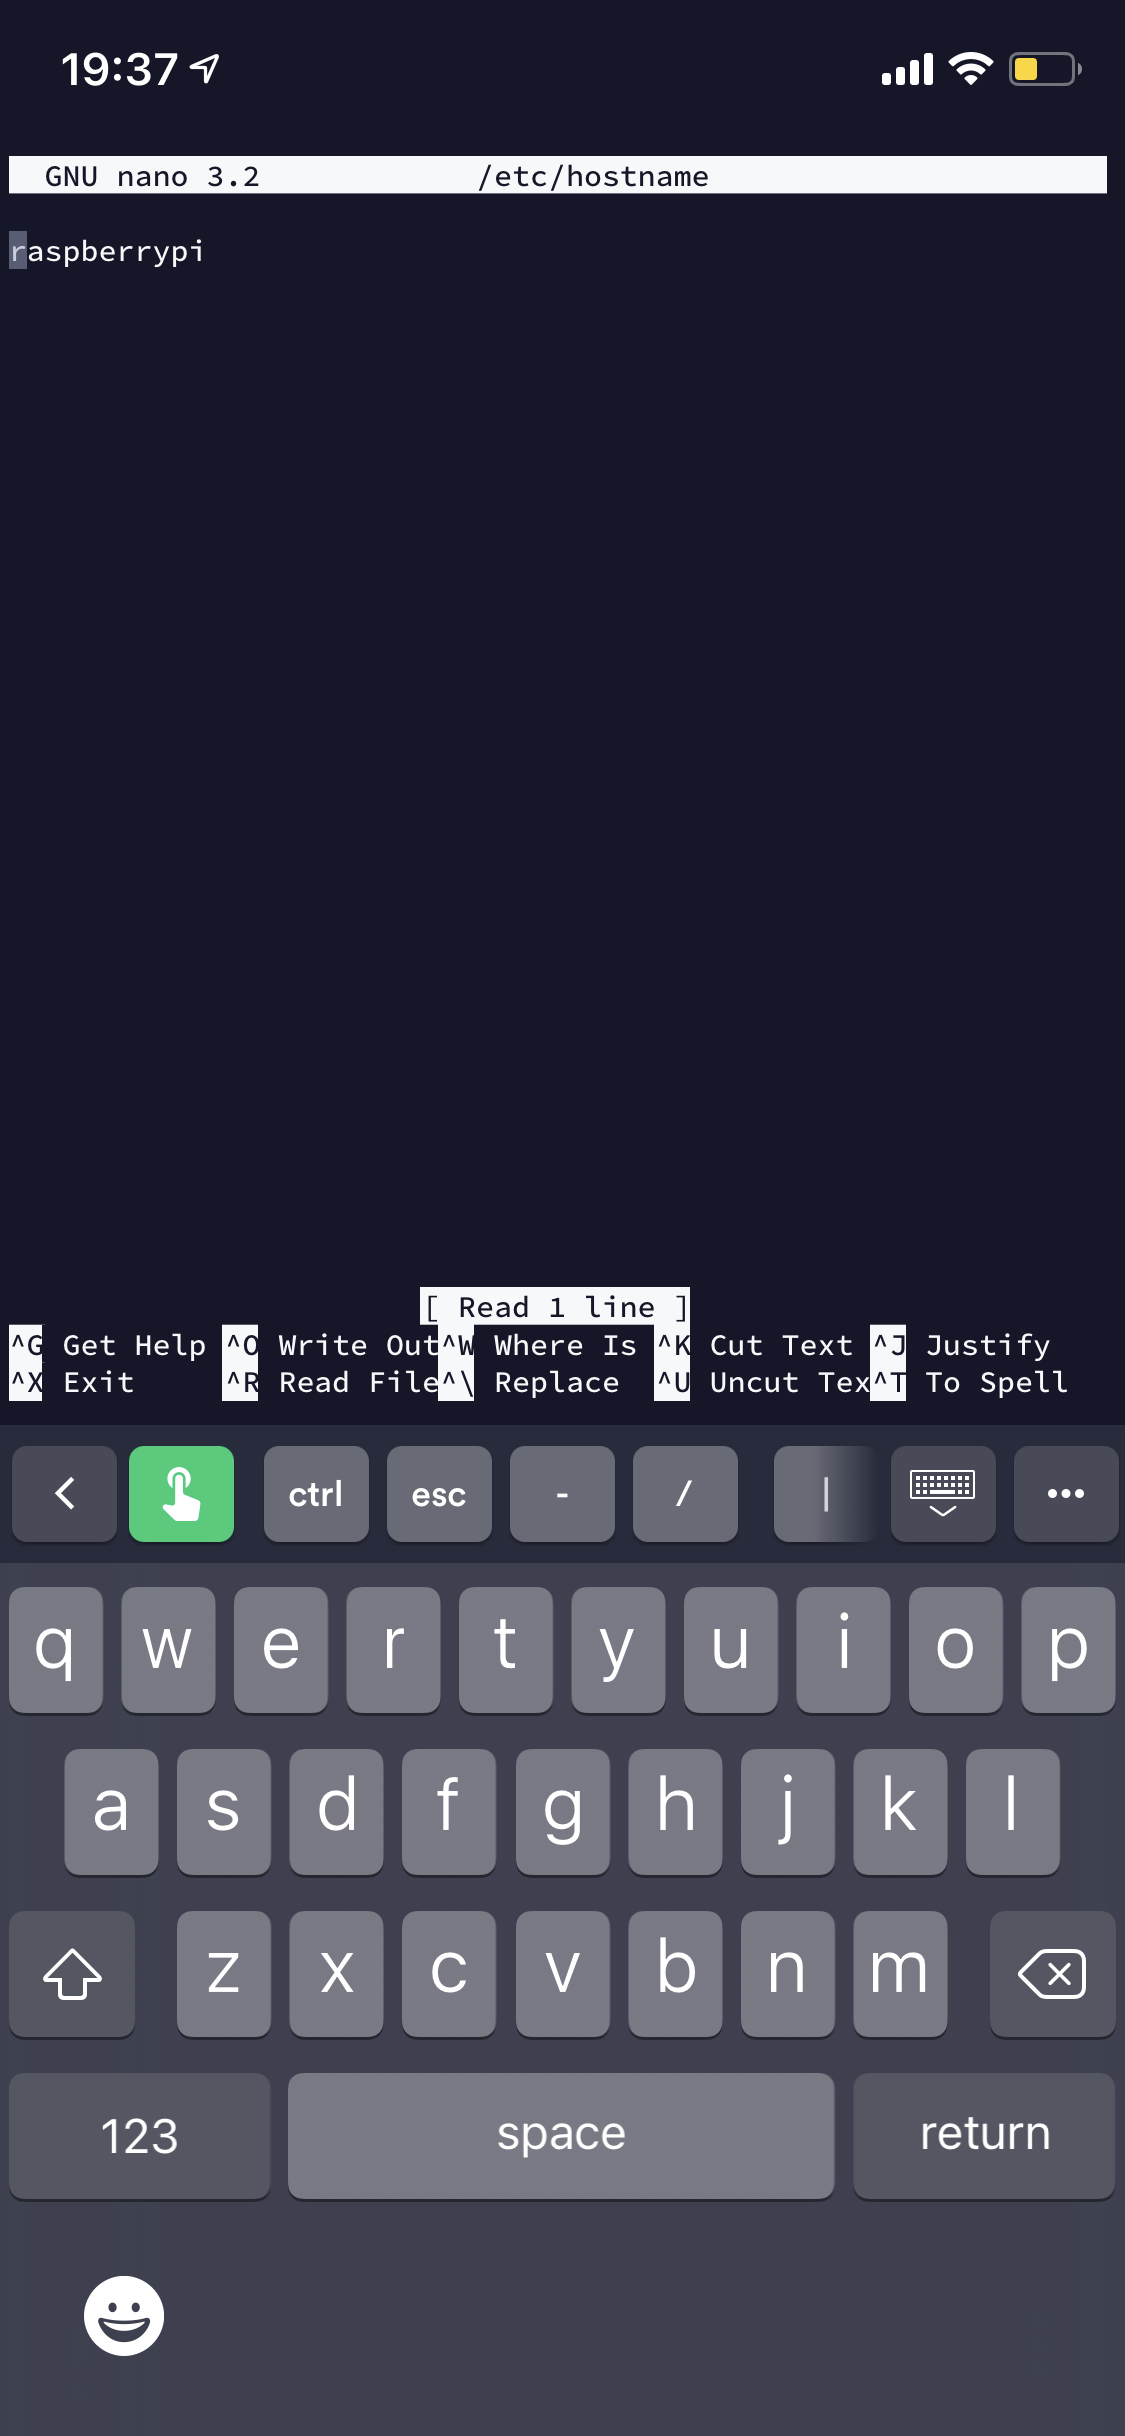
Next up, lets change the hostname of the pi from raspberry pi to a hostname of your choosing by entering:
sudo nano /etc/hostname
Next, we will change the hosts file so that the localhost (127.0.0.1) entry has the same hostname. Enter the following:
sudo nano /etc/hosts
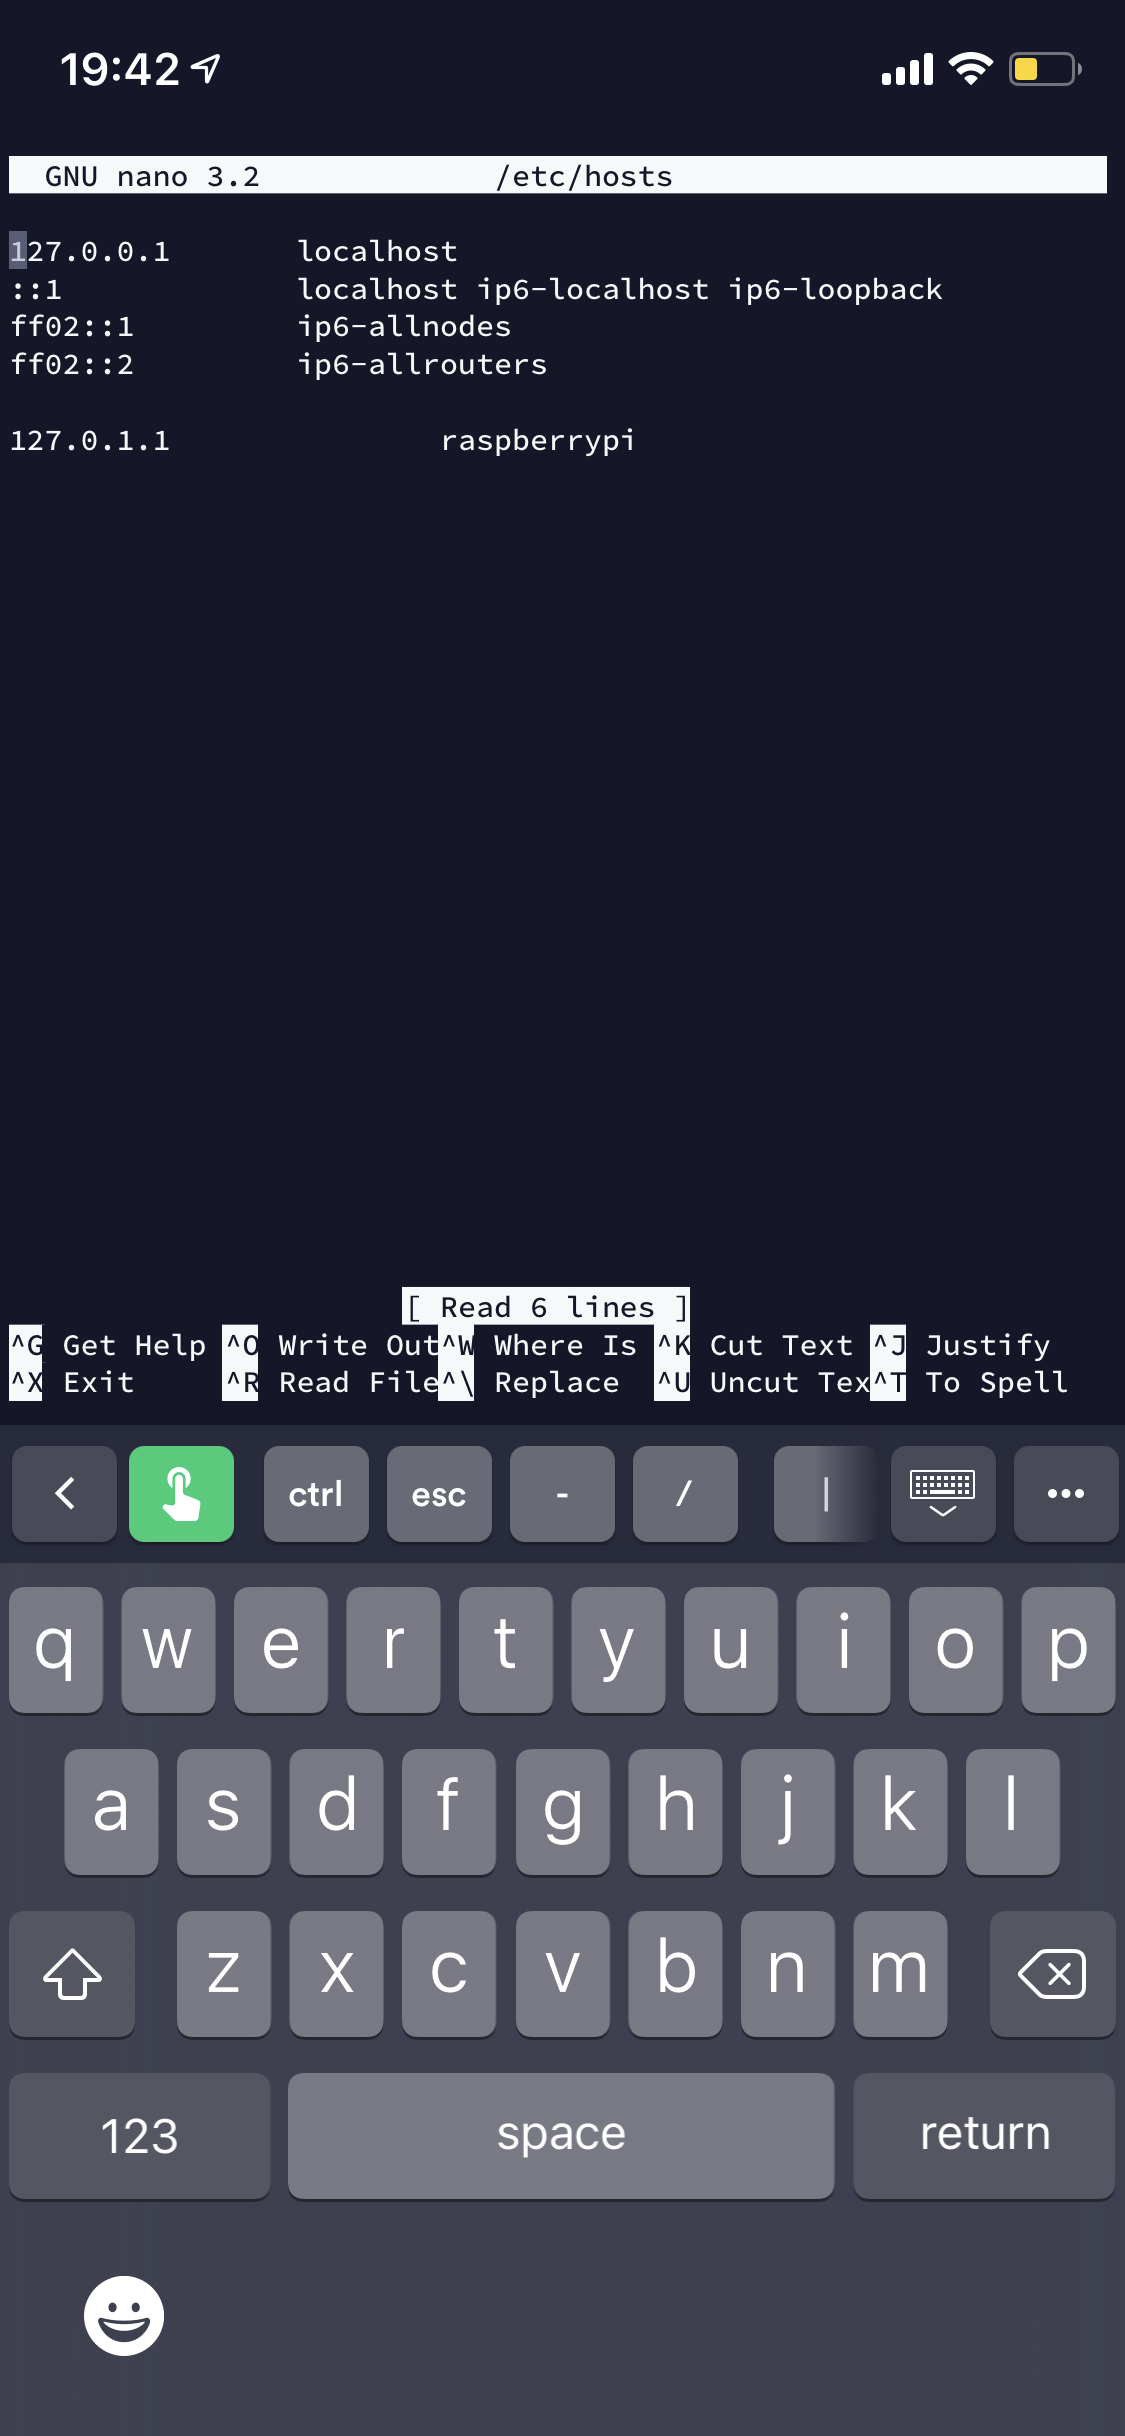
As before, change the text “raspberrypi” to the hostname you used previously, and again save the file by entering ctrl + x, then y.
Now, sudo reboot the pi and login as the new user that you created.
Lets now delete the default user:
sudo userdel pi
Now delete the home drive of the default user:
sudo rm -rf /home/pi
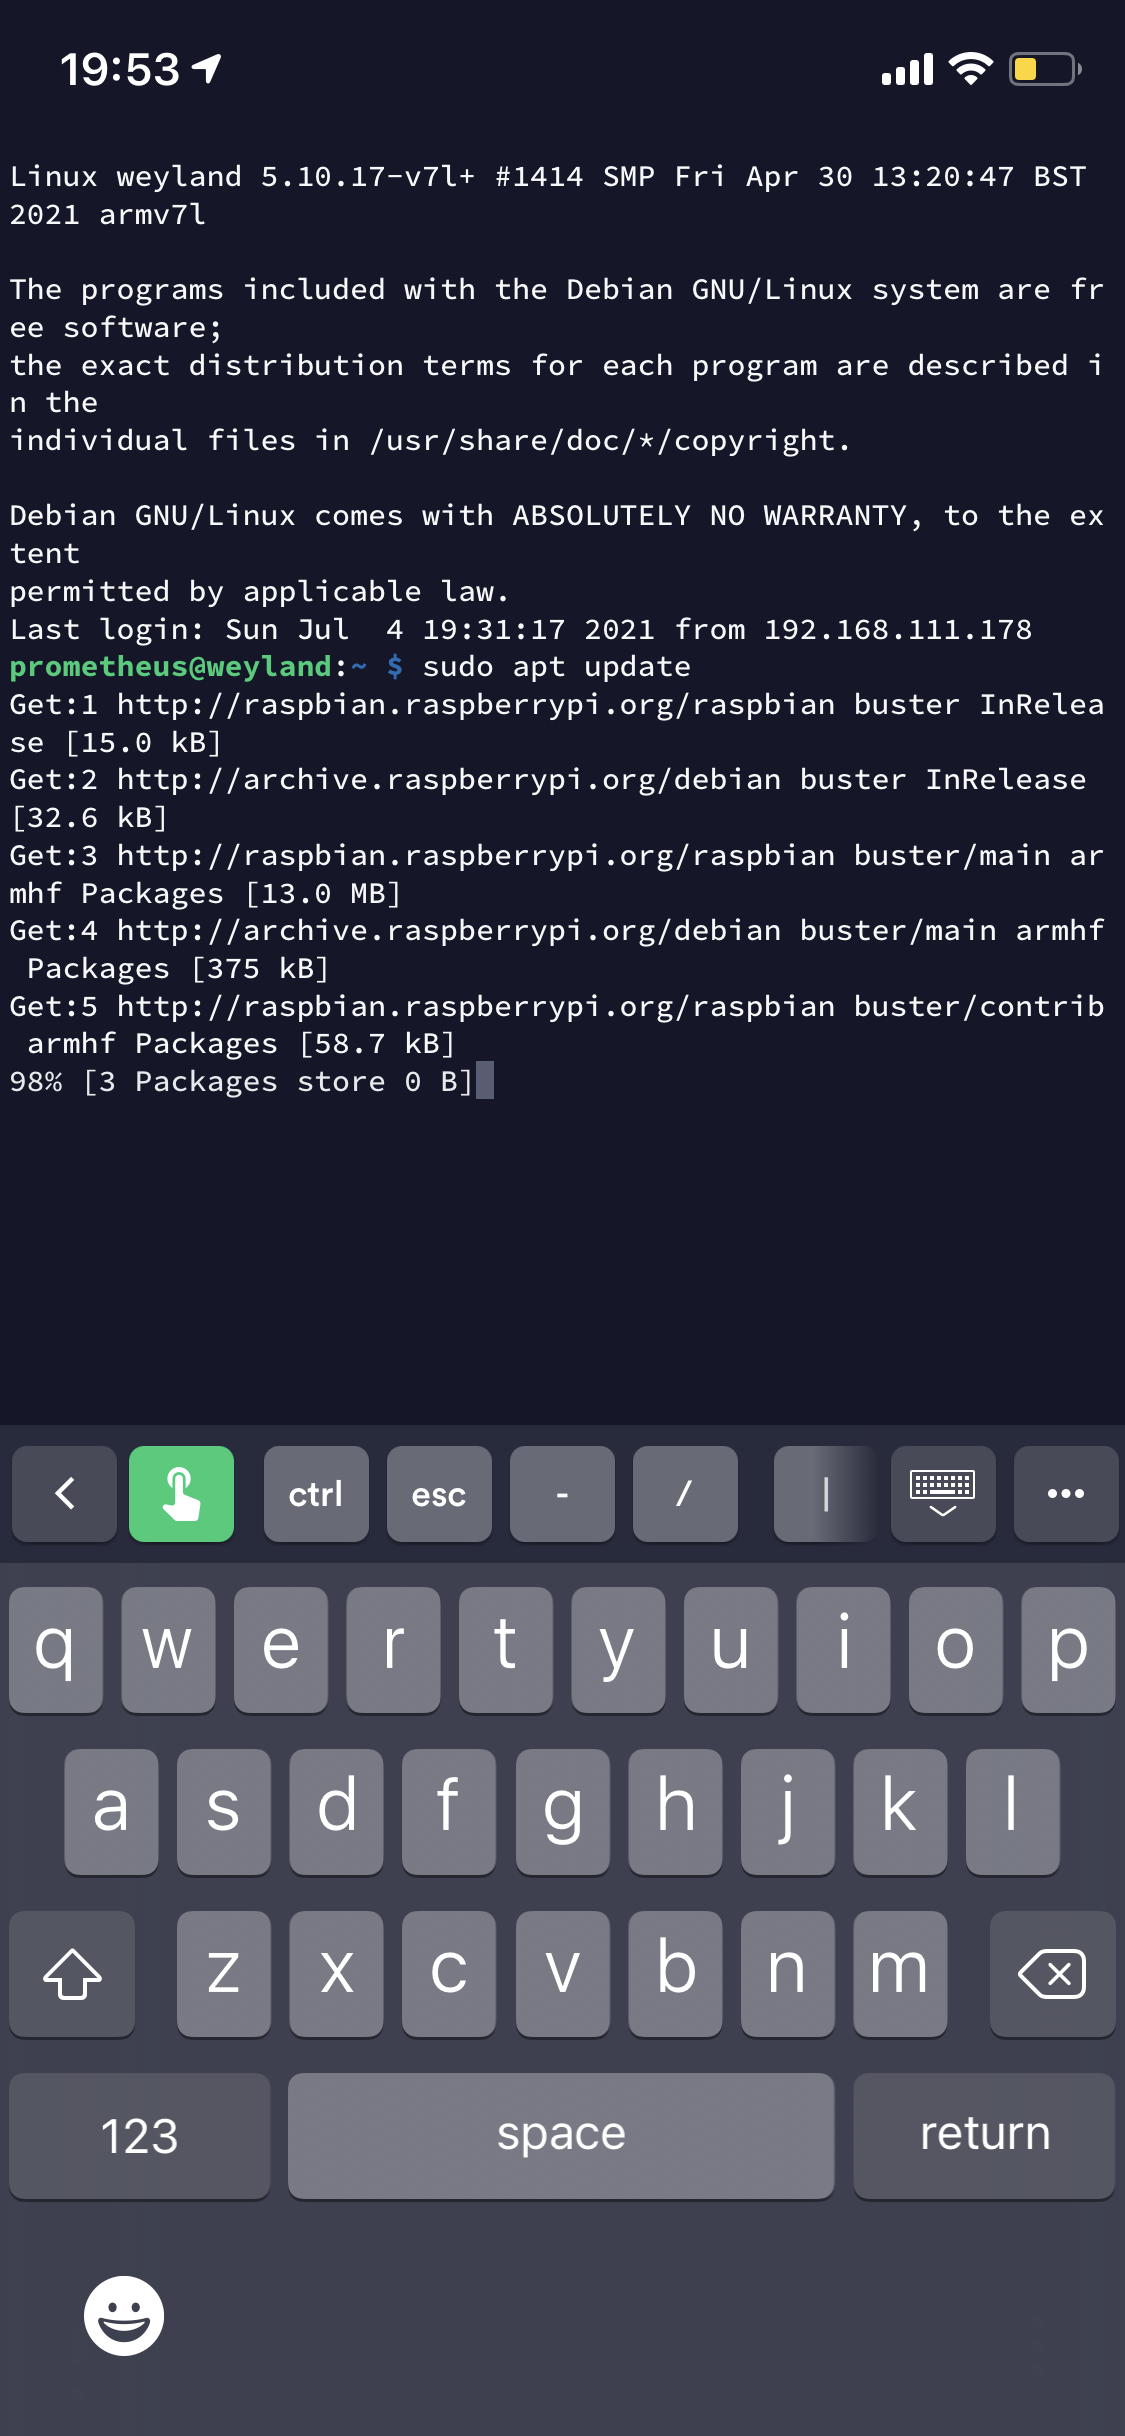
Next up, now that we have replaced the default user, which is an insecure configuration, let’s update the software.
First, update the catalog:
sudo apt update
Now lets upgrade all software (enter y when prompted then press enter):
sudo apt upgrade
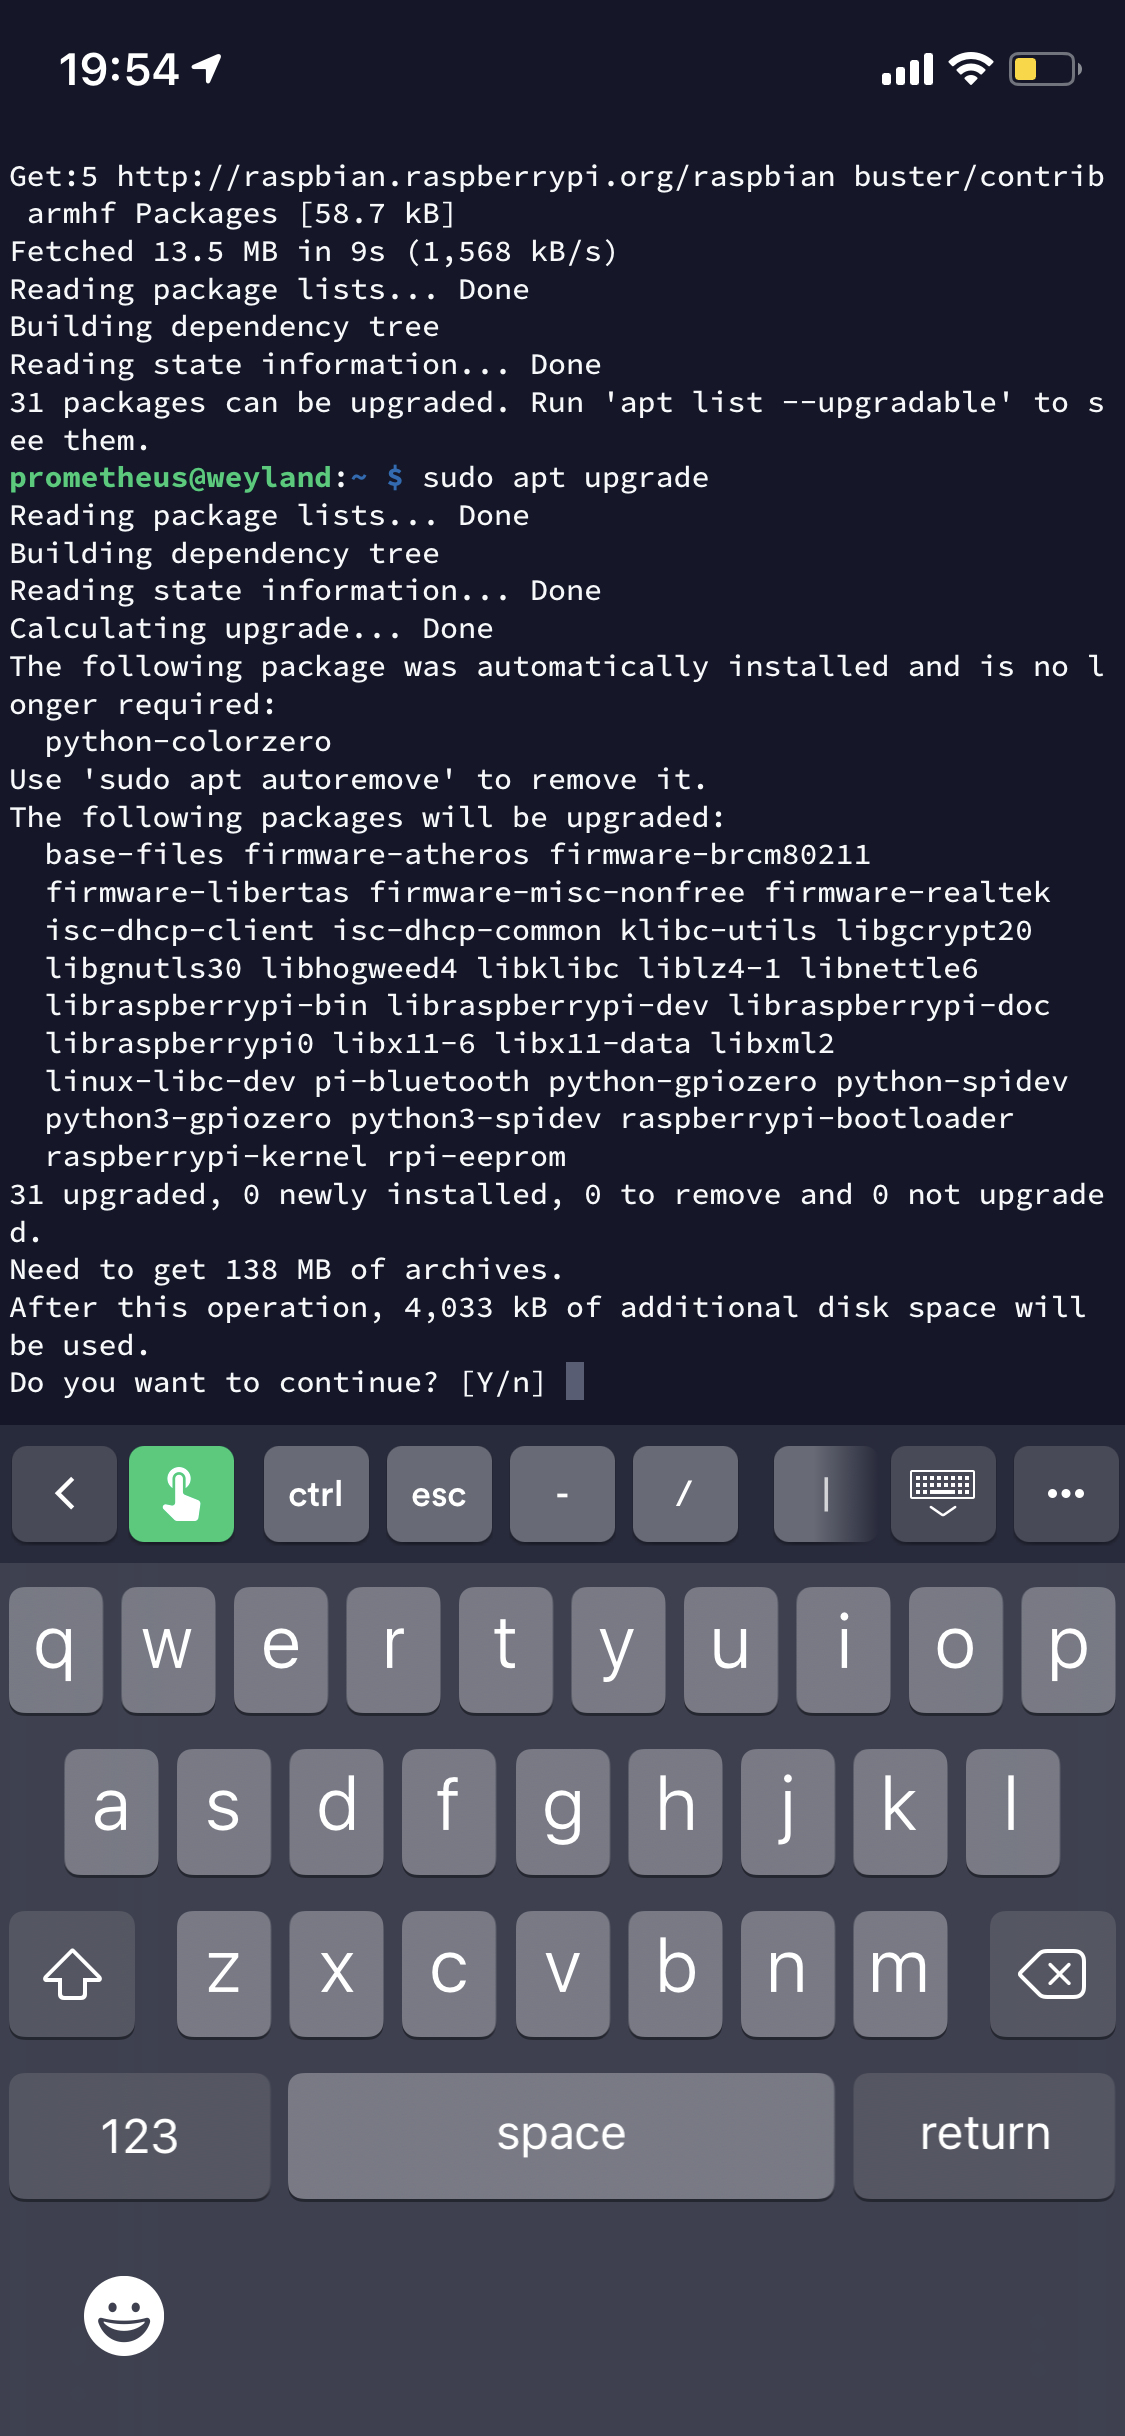
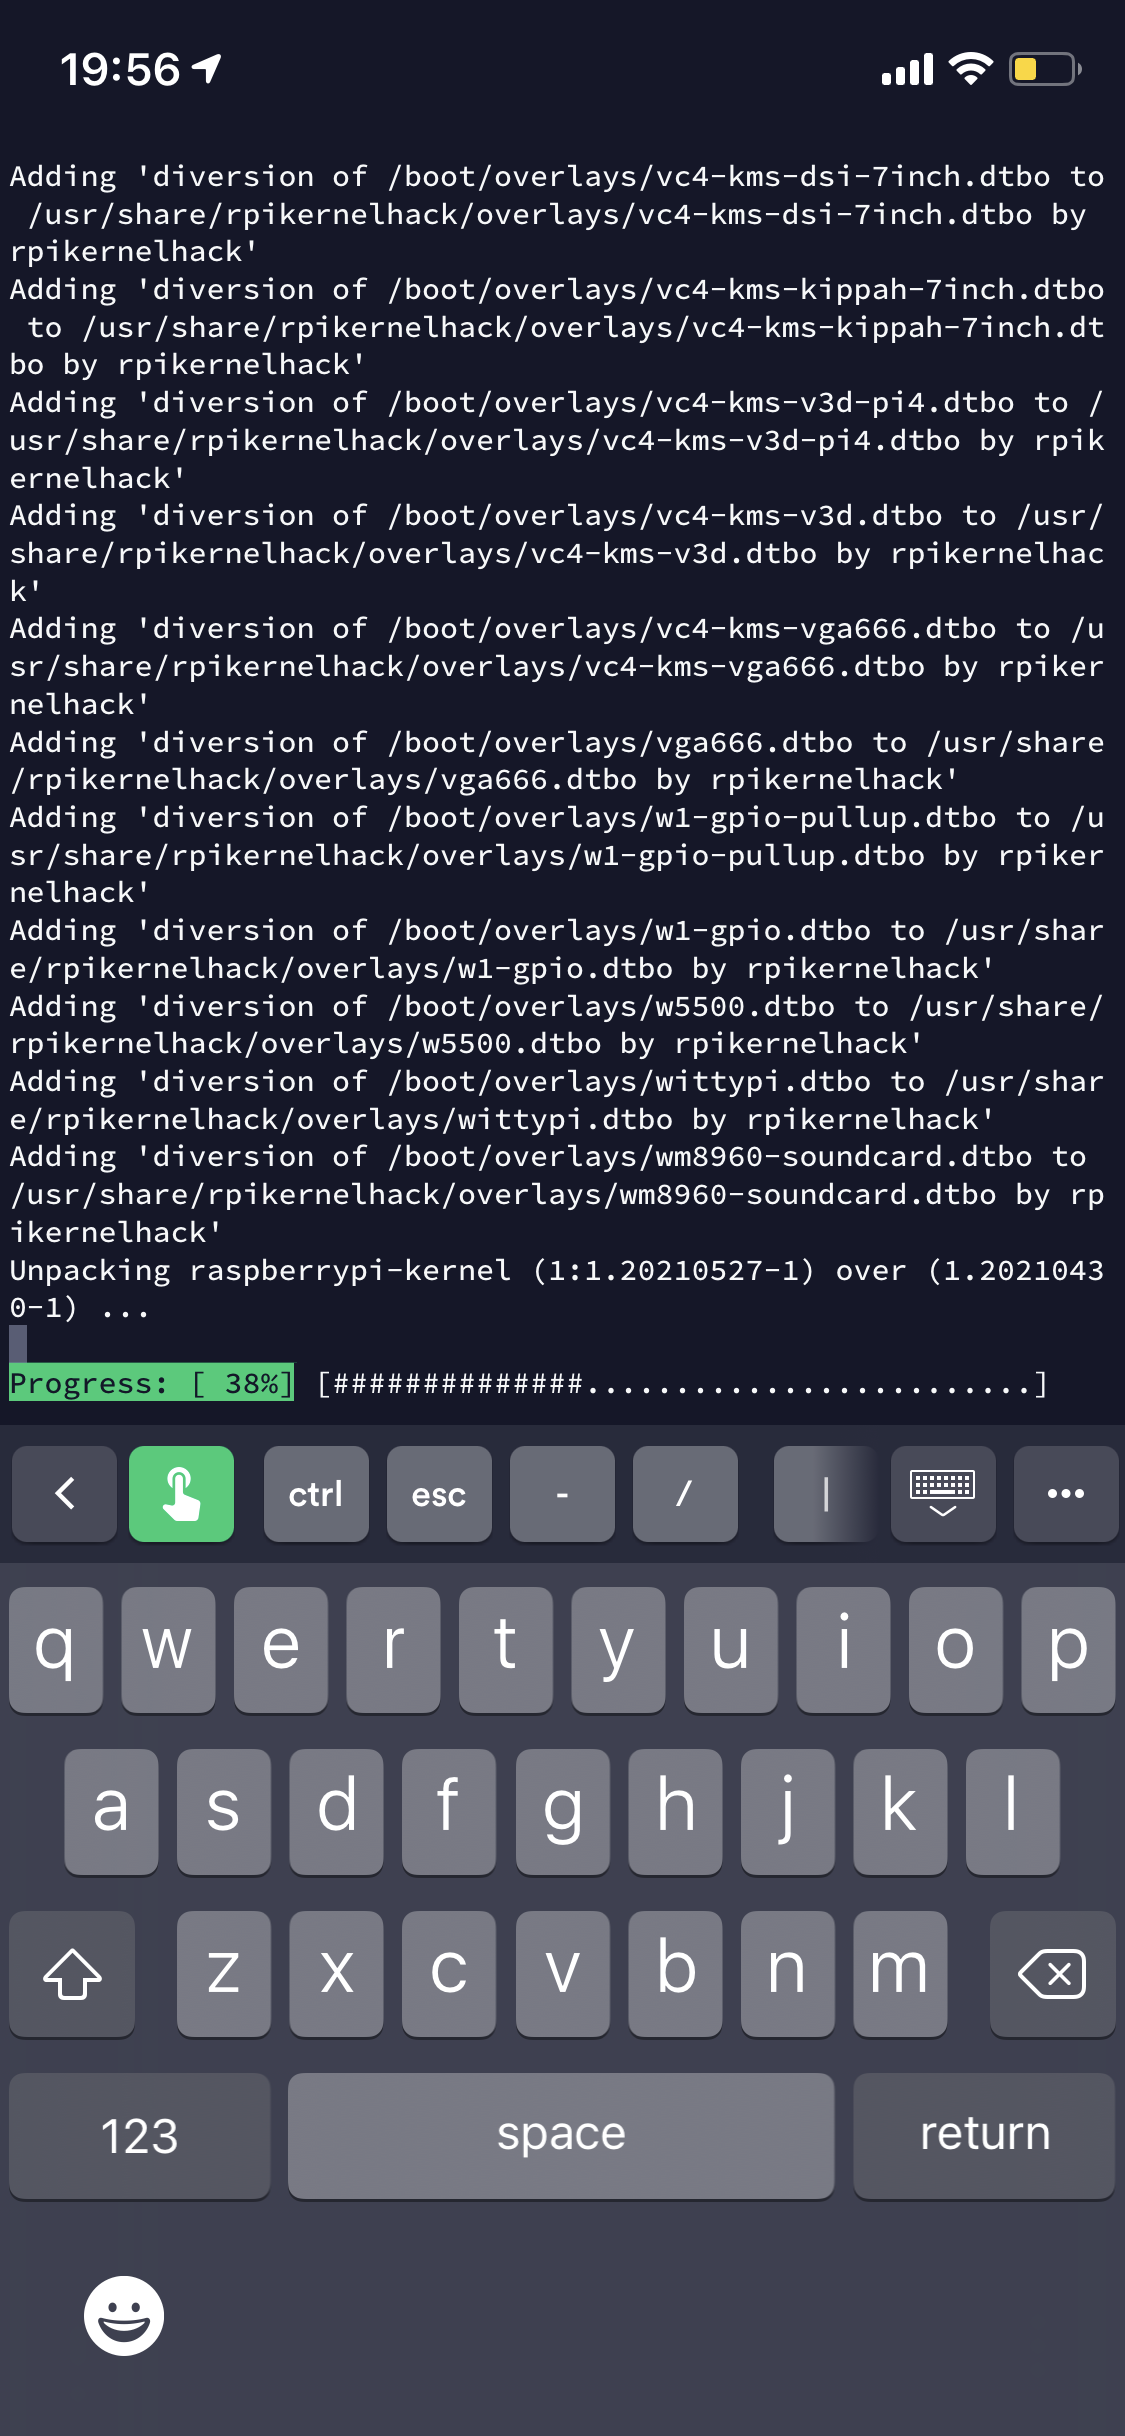
You will screens such as below whilst the upgrade is in progress - do not close your SSH session whilst this is in progress.
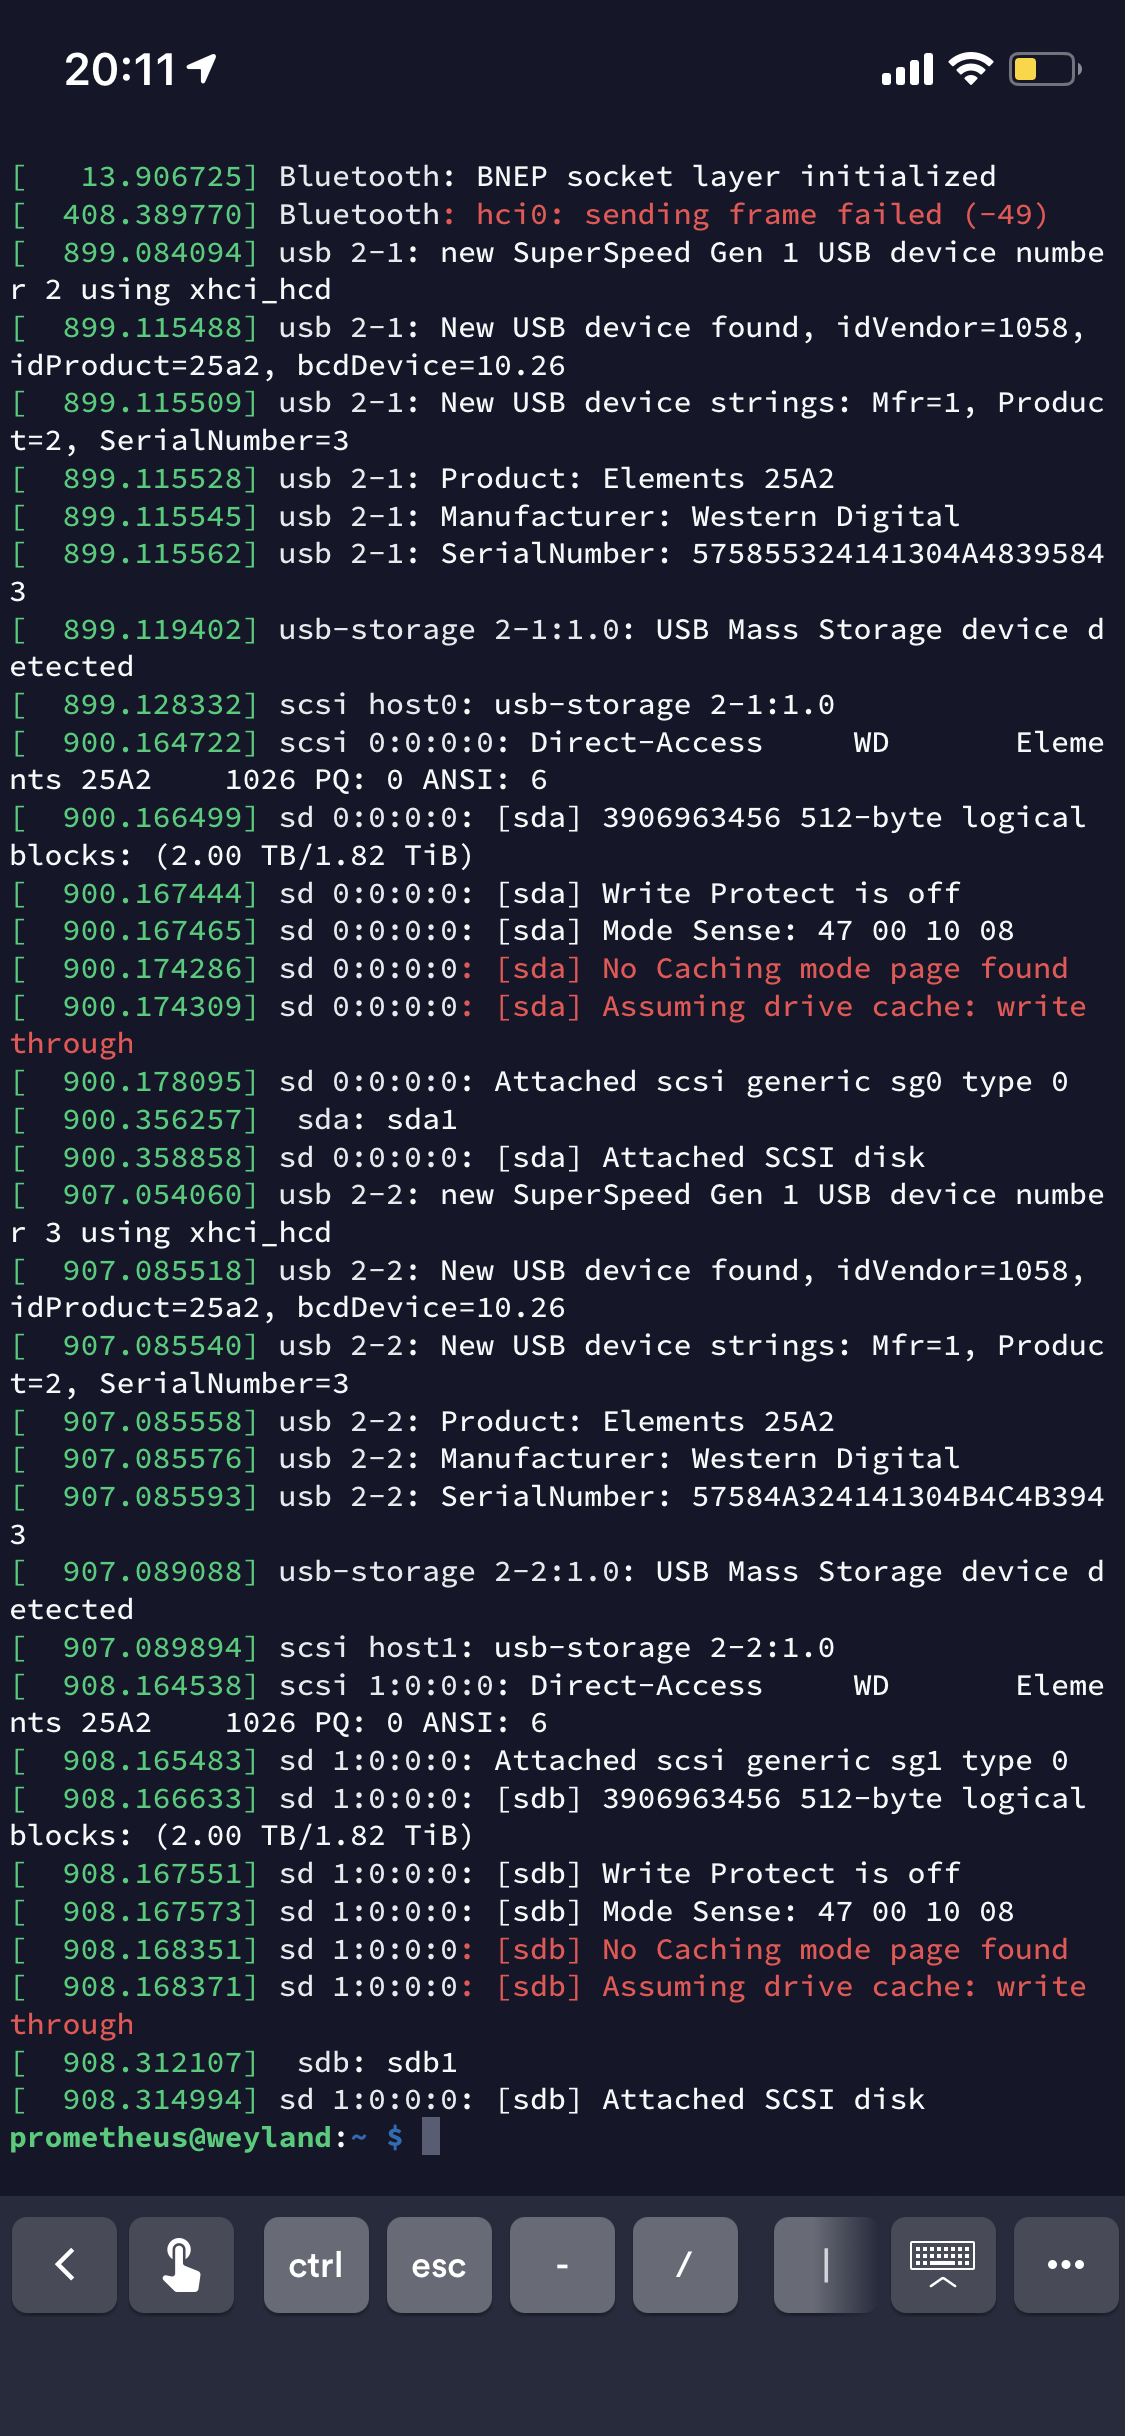
Next, we want to connect our USB hard drives to the pi.
Once done, enter the command dmesg
Next up, we will setup SSH Public Key authentication rather than using username and password. In my case I’m using the Termius SSH client on my iphone, though more generic instructions are available here.
If you’re using Termius, tap on Keychain from the home screen, then click on + then Generate Key;
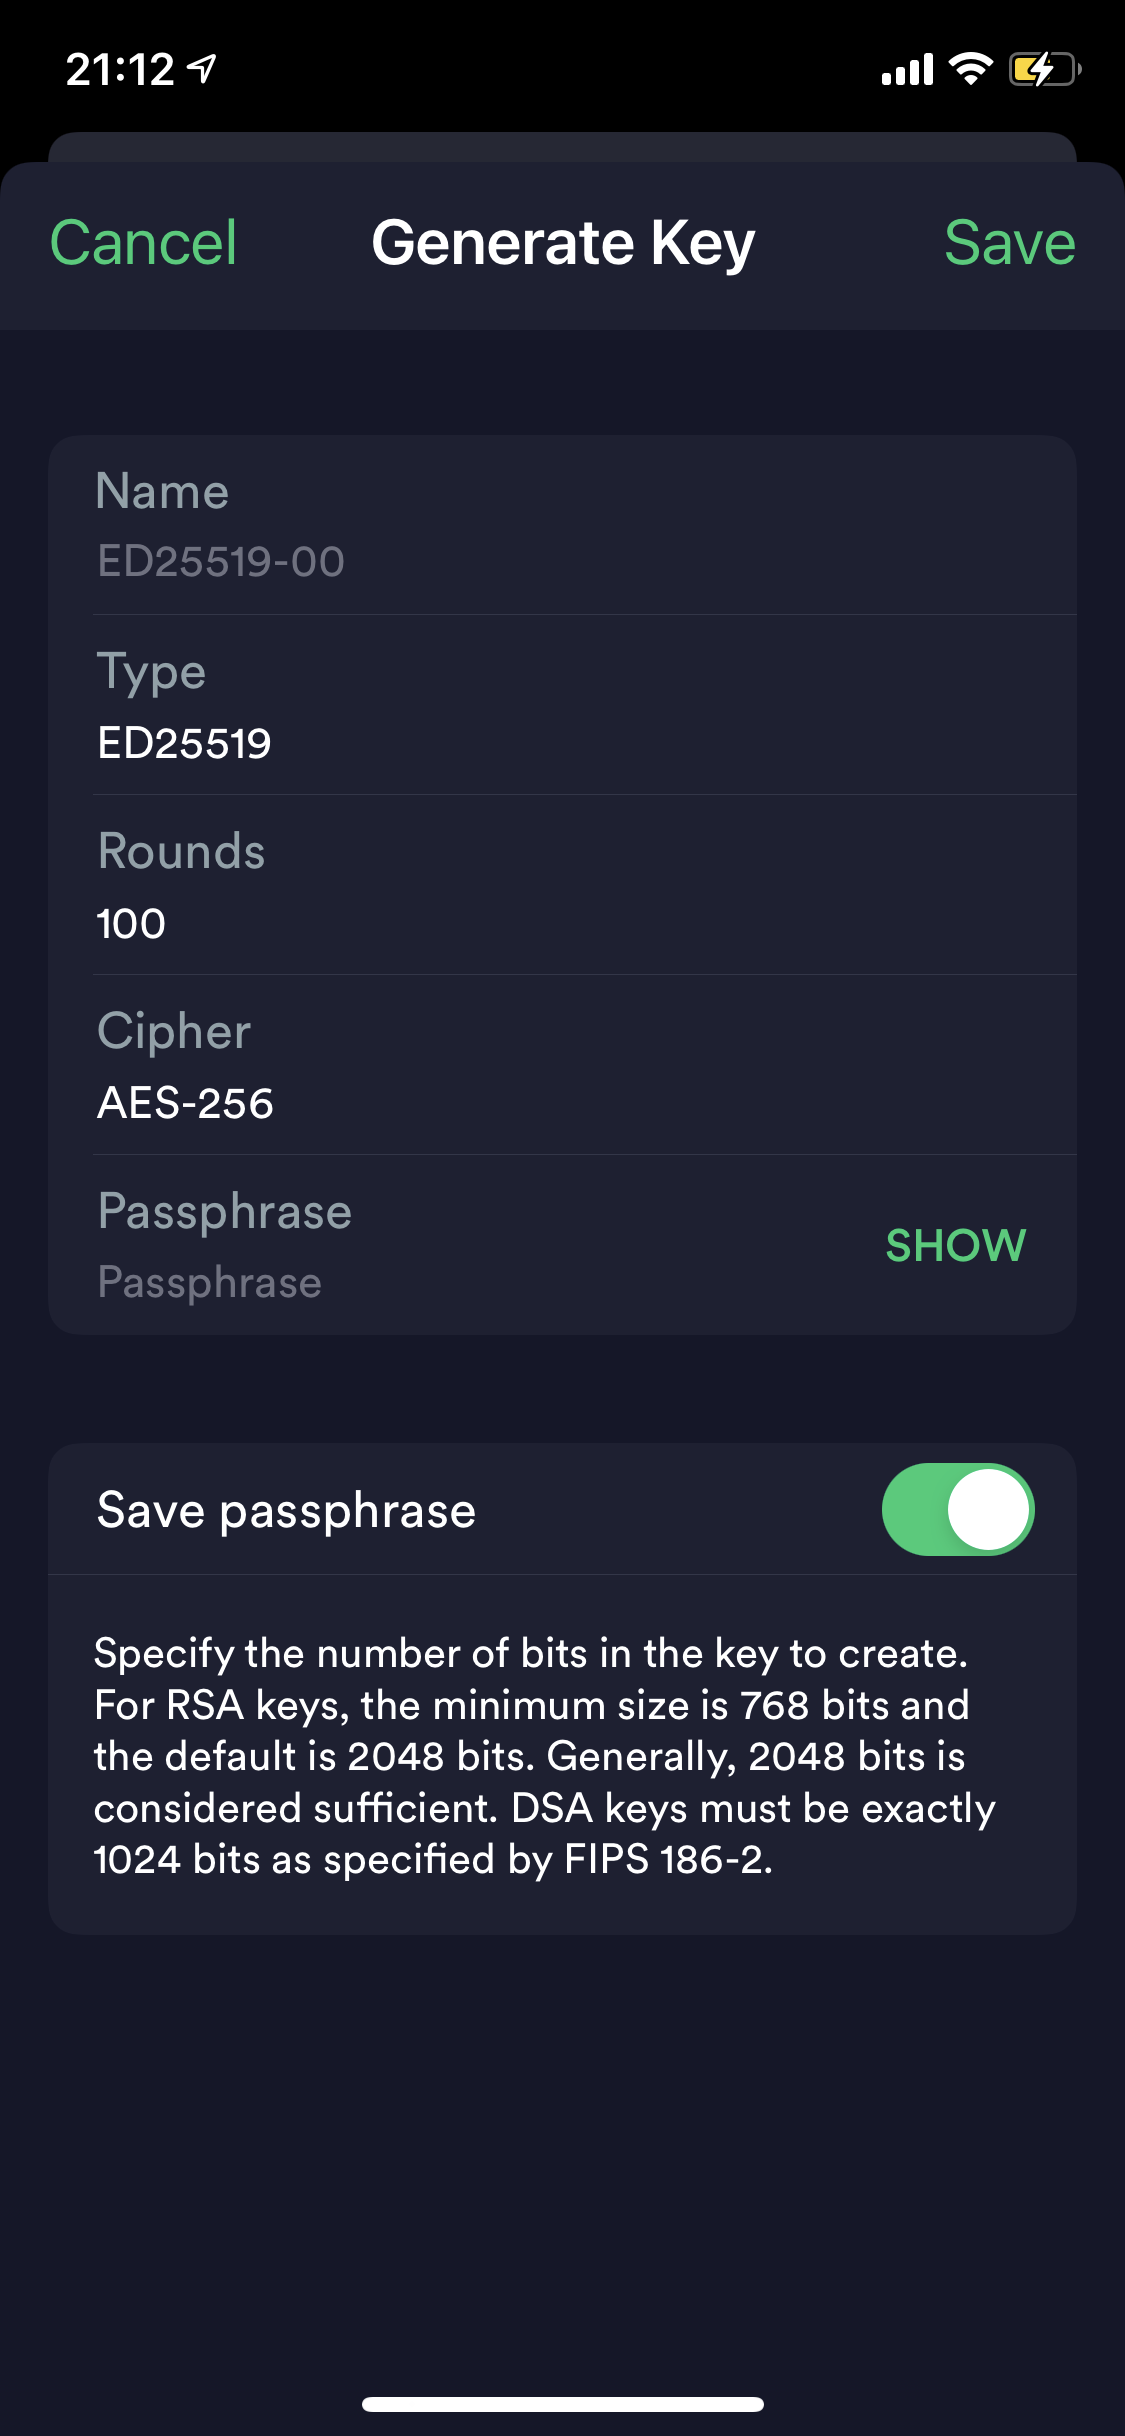
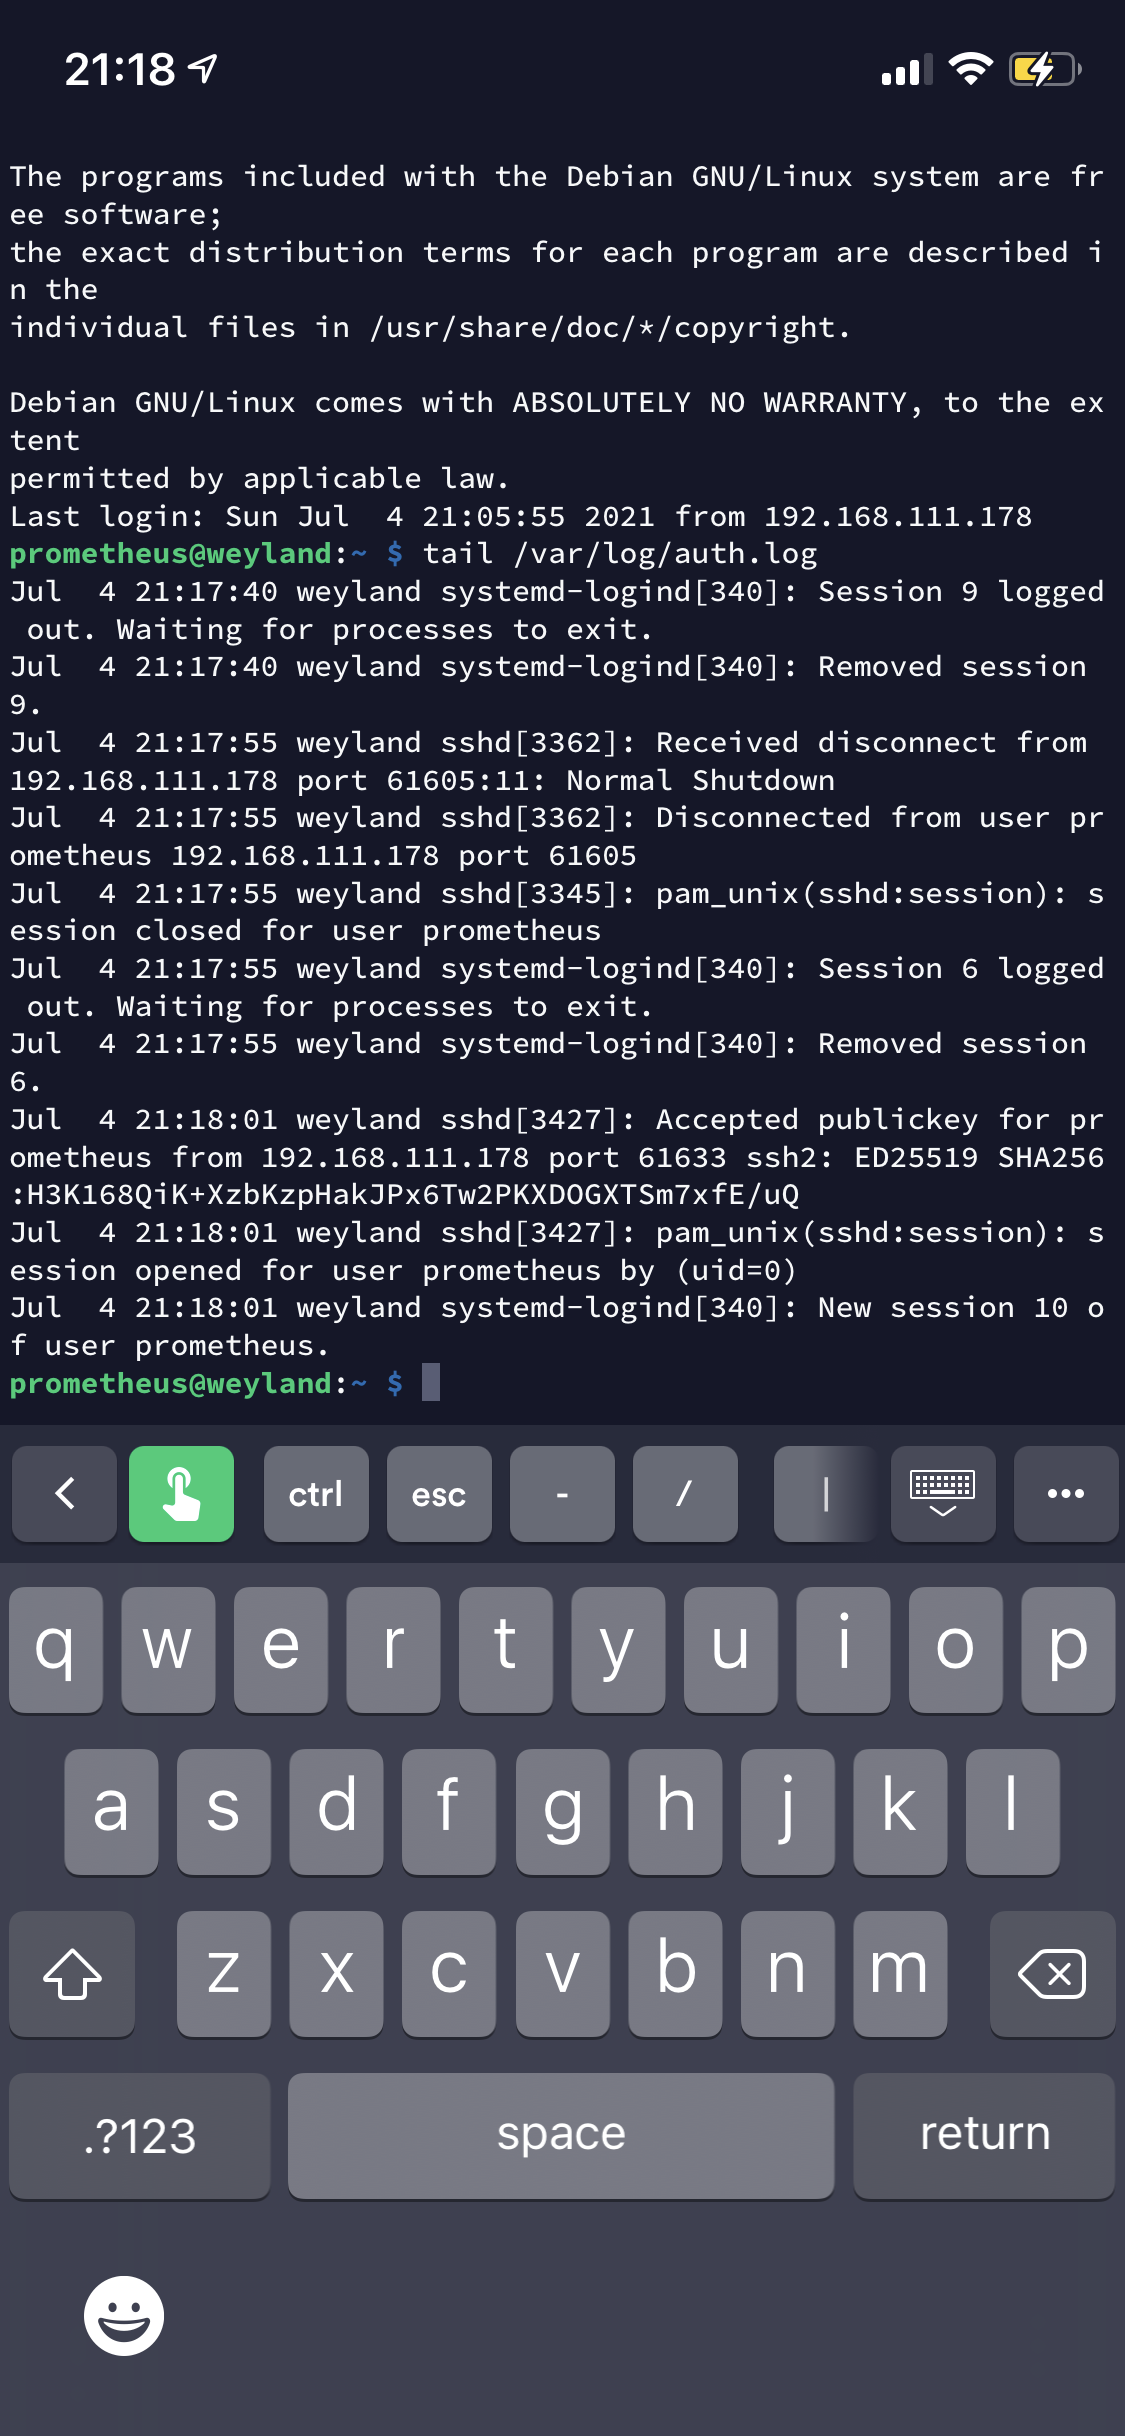
Fill out the screen as above and then on your host config, select the key you created then reconnect to your Pi. Then, to check you logged in with SSH key and not username password (which may be stored in your SSH client), enter tail /var/log/auth.log and look for confirmation that you authenticated via your SSH public key:
Once that is working, you want to disable password authentication - as passwords can be bruteforced and guess, it is much more difficult to breach a system using only SSH Public Keys for authentication.
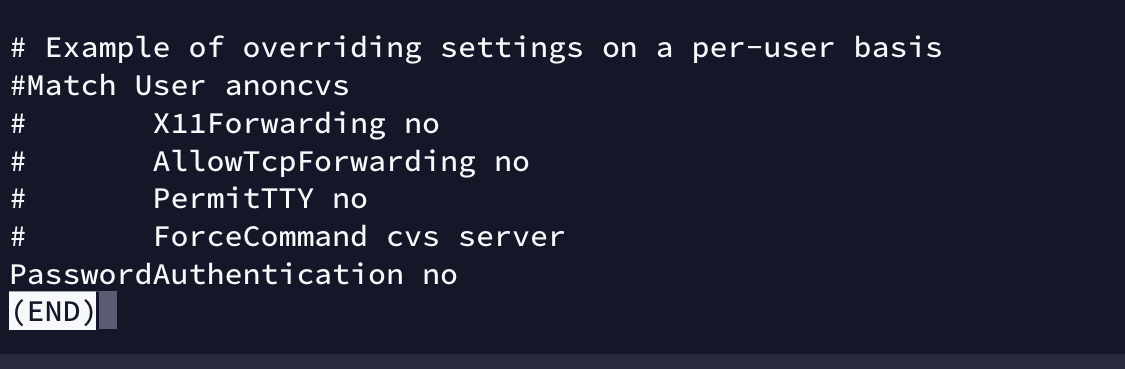
Enter sudo nano /etc/ssh/sshd_config, find the line containing the text PasswordAuthentication, remove the hash/comment character from the start of the line reads PasswordAuthentication no. Then press ctrl + x and then y to save the file
In the next post we will start to install and setup Open Media Vault as our one stop shop for system management and Media functions from a friendly GUI
As ever, thanks for reading and feel free to leave comments down below!
If you like what I do and appreciate the time and effort and expense that goes into my content you can always ![]()