Image by John Salvino on Unsplash
In my last post, Grav in Azure part 3 - Creating an Azure Web App with code deployed from Git, I demonstrated how to setup a webapp in Azure and deploy code to it from a Bitbucket repo with the Grav Blog Site skeleton code.
In this post, we’ll take a domain name and pass the management of the DNS to Cloudflare then link the domain name to the Azure origin address and url so we can take advantage of Cloudflare features (the subject of a future post in this series).
What you will need
- An Azure account
- An Azure web app
- A domain name to associate with the web app
- A cloudflare free account (or you can create during the tutorial
- I’m using a Windows 10 laptop - so to follow along exactly, you’ll need the same - though I’m sure most steps will work just about the same on a Mac or a Linux desktop, albeit using different desktop apps/tools.
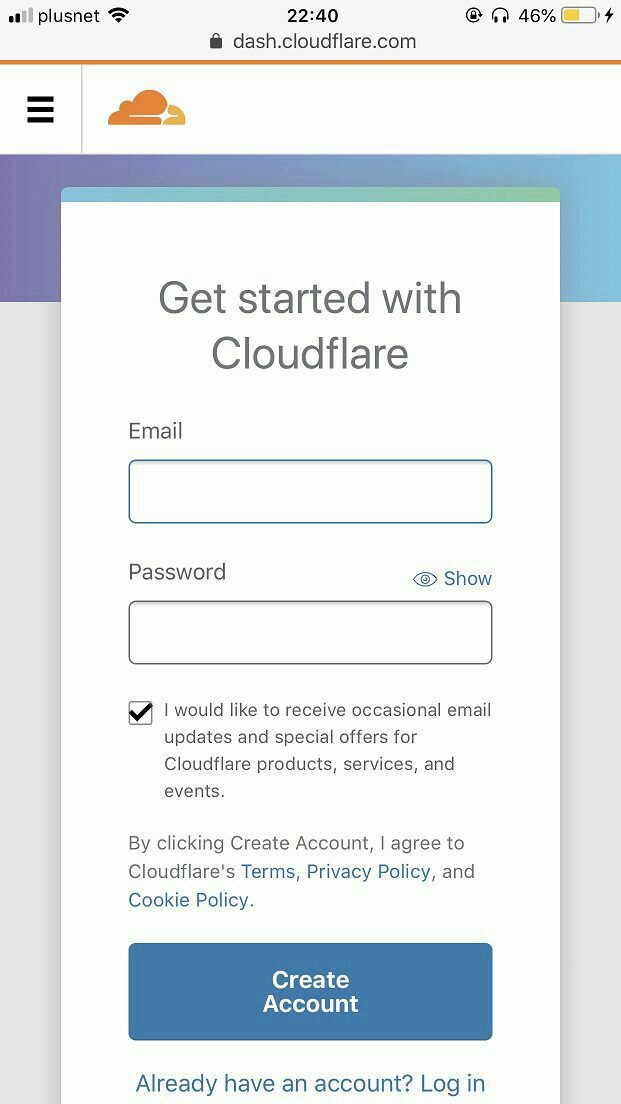
If you don’t already have a Cloudflare account, you can signup here.
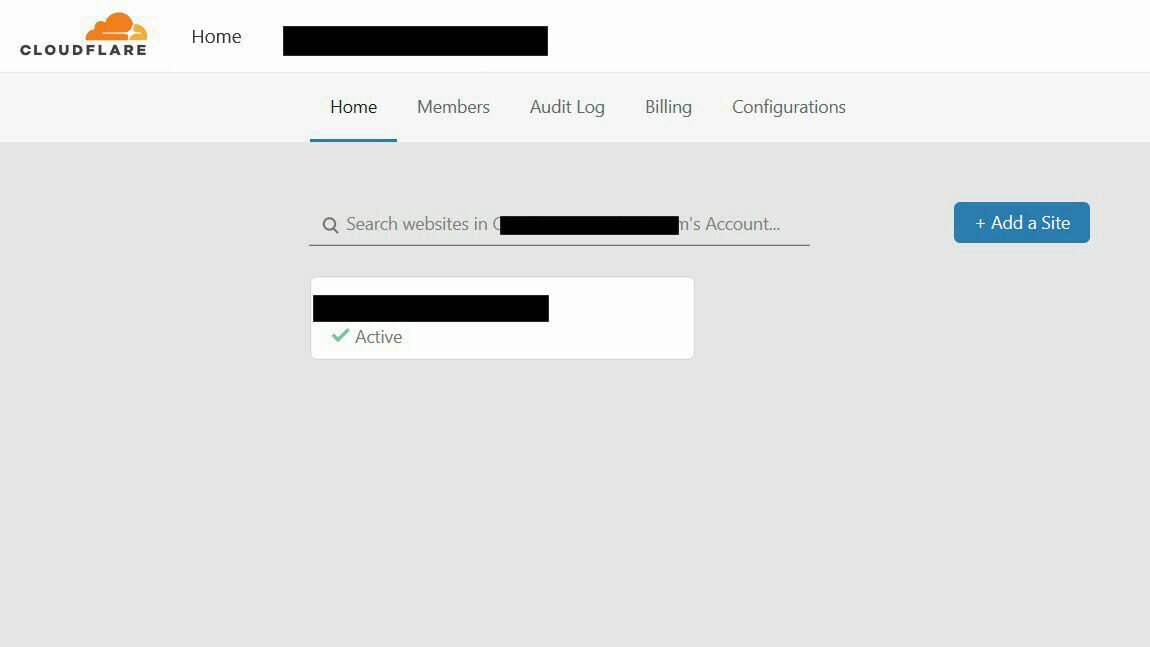
Once logged in, any sites you’ve already added to your account will be listed:
Click on Add a Site
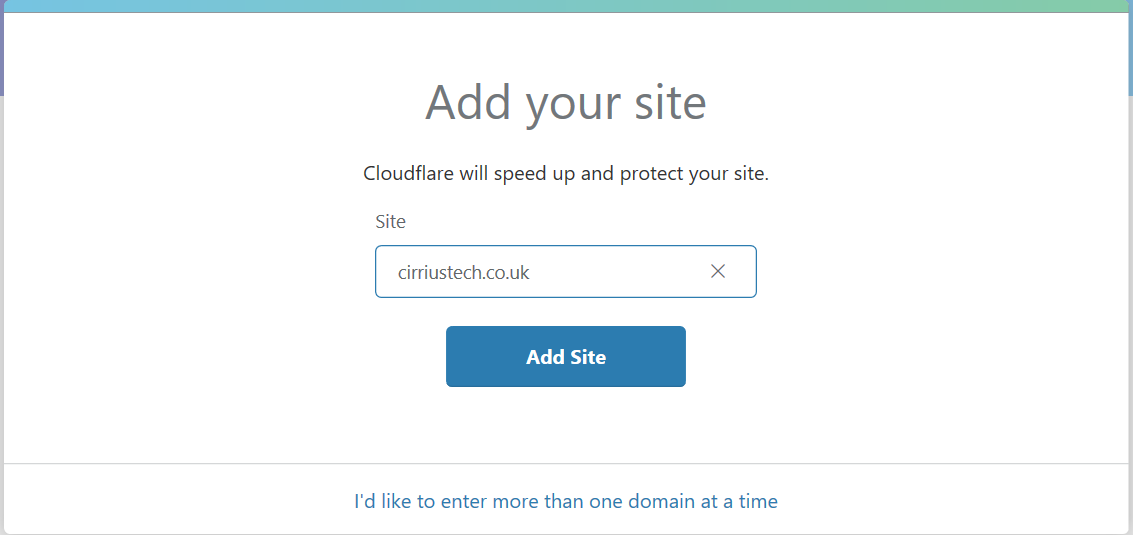
Enter the domain name you want to associate with the website and with Cloudflare - in this example, cirriustech.co.uk Click on Add Site
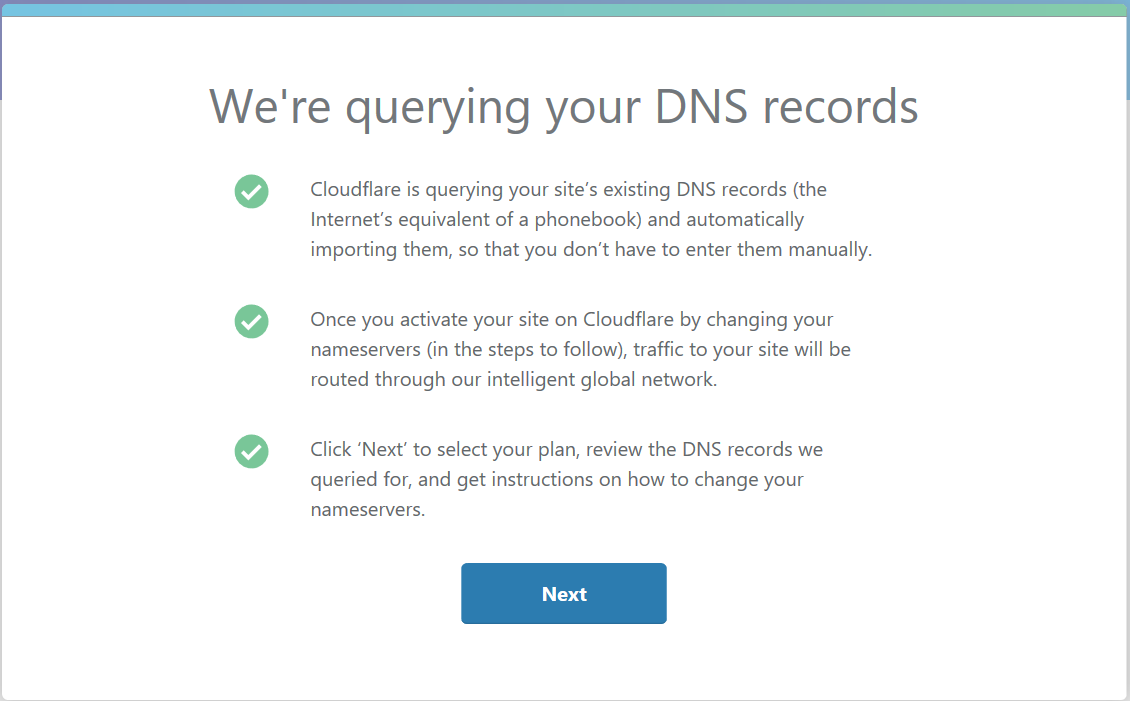
You should now see a screen showing that your DNS records are being queried. Click Next
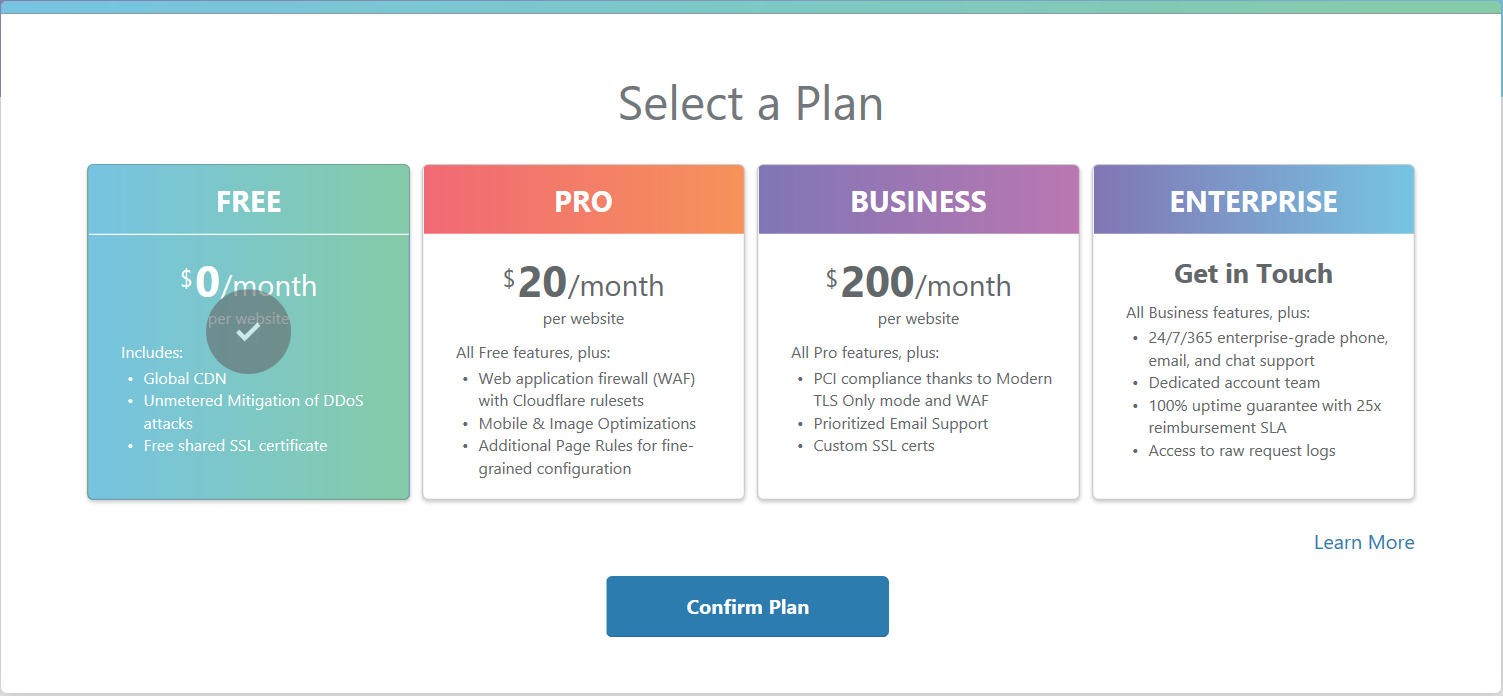
You will see a number of plans available as show below:

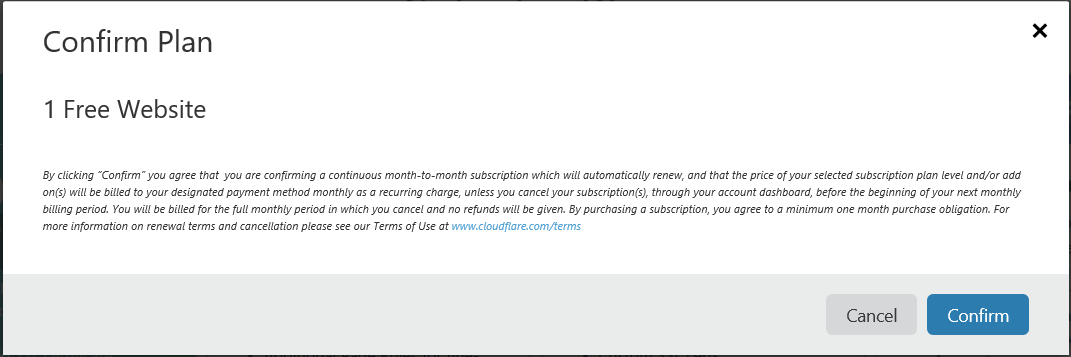
For our purposes, click on FREE then click on Confirm Plan
Click on Confirm
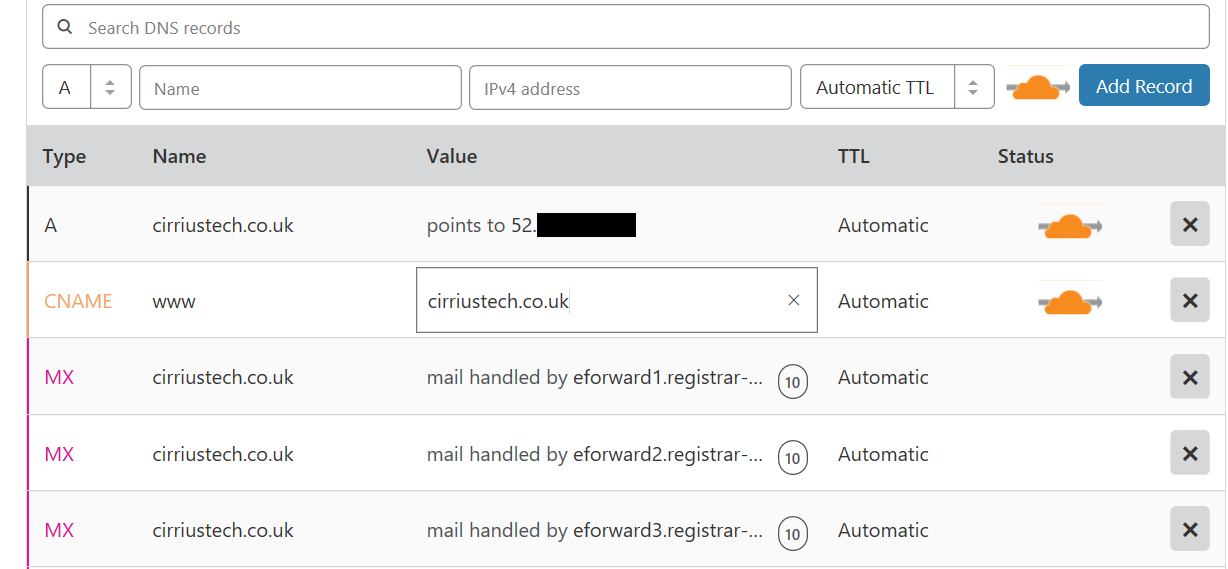
You will now see your DNS records as queried by Cloudflare - ensure the domain is correct in the CNAME record and also the IP address for your azure web app is correct in the A record (you can access the IP information on the Settings > Custom Domains page of your Webapp in the Azure portal). Also ensure both the A and CNAME records have an orange cloud beside them showing that cloudflare is active for them.

Click on Continue

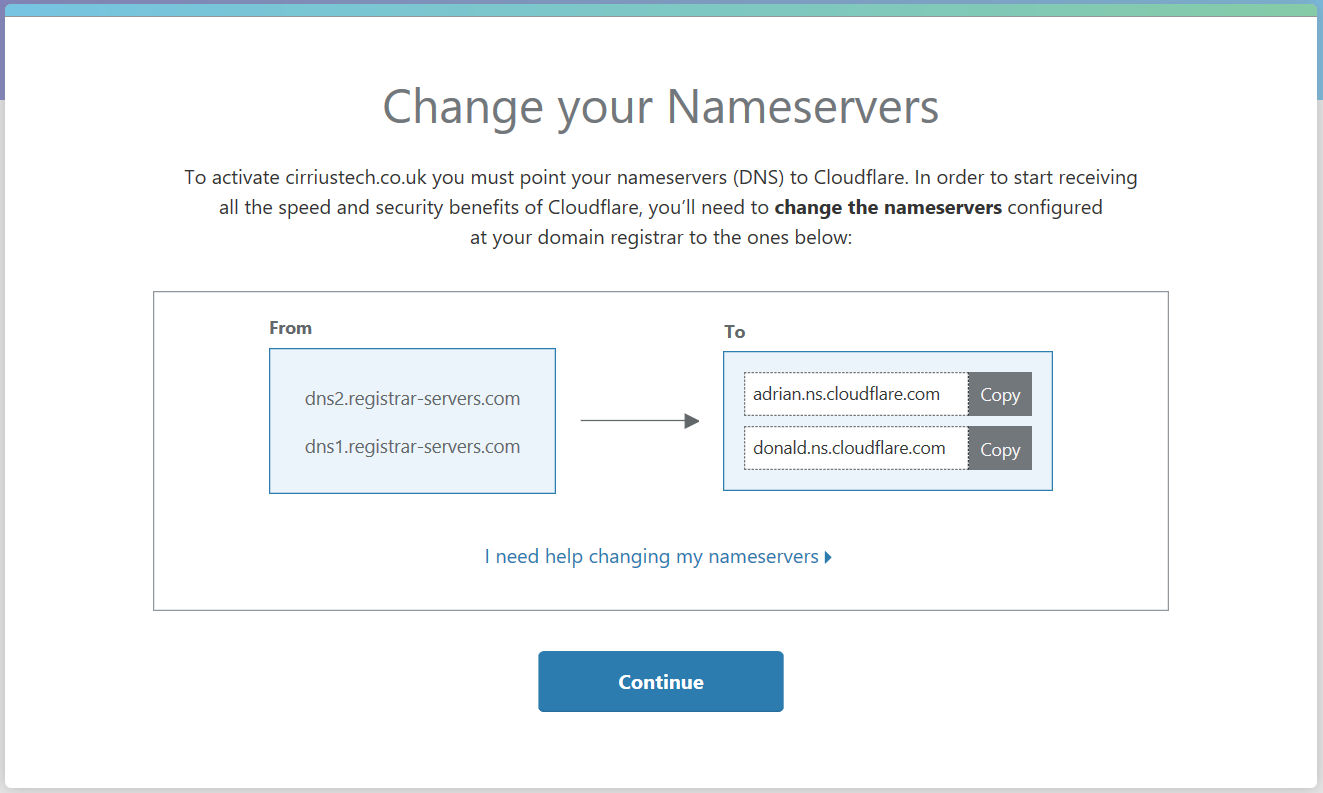
You will now see a prompt to change your name servers via your domain name registrar. I’ll show how you do it with Namecheap.com which is who I use - for other registrars, login to your account and perhaps check out their help/support information if it is not entirely clear how.
You can either click Continue, or wait until you have changed your name servers.
In a new browser window/tab, login to namecheap (substitute your own registrar from here on in):
Click on MANAGE beside the domain you want to manage

Click on Advanced DNS

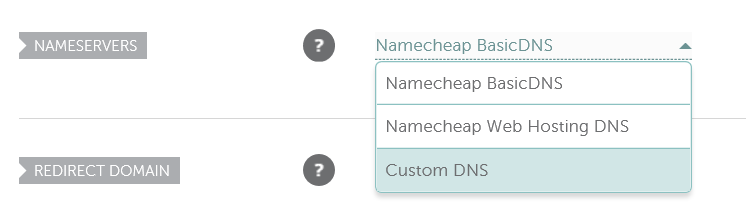
Beside NAMESERVERS, click on the dropdown box and select Custom DNS
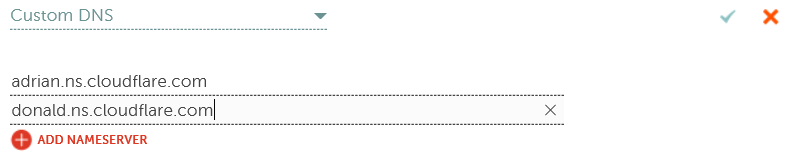
Enter the name server details provided by cloudflare and click on the tick icon when complete:
You should see a screen advising that DNS server updates may take up to 48 hours (often it can be much less):

While you wait for that, login to the Azure portal at https://portal.azure.com and navigate to your webapp.
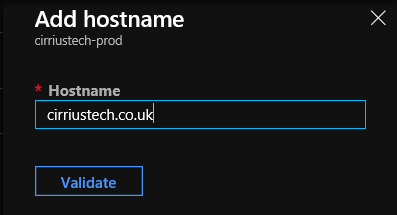
Then, under the Settings heading, click on Custom Domains then click on Add hostname:

Enter the domain name you added to cloudflare and click on Validate
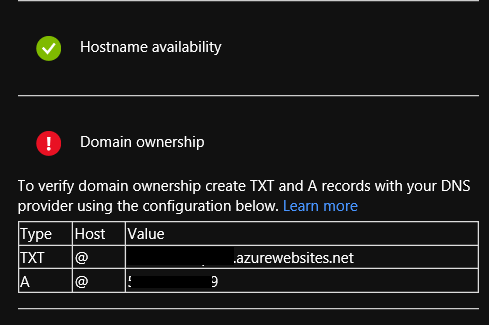
Azure will need to validate (as you would hope and expect they would), that you own the domain name you are trying to link to your webapp.
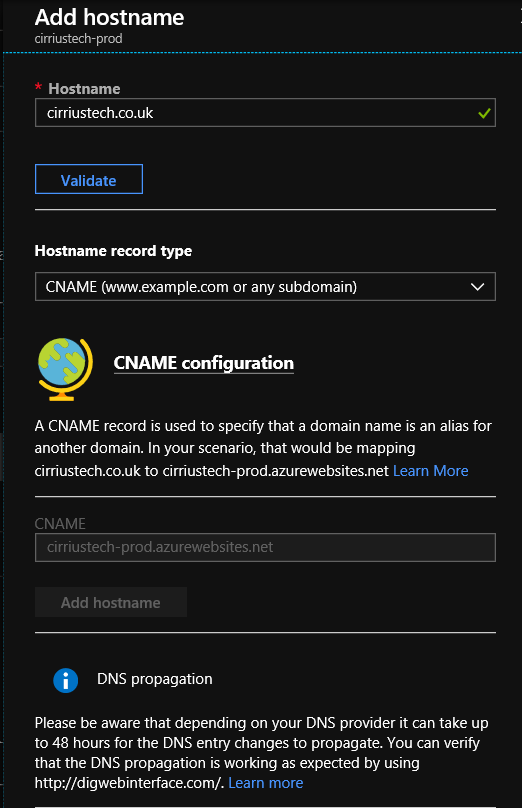
Change the Hostname record type from CNAME record to A record

You will now be advised what records to add to your DNS - as you’ve already kicked off the nameserver change to cloudflare, wait until that completes before then making the DNS changes in Cloudflare.
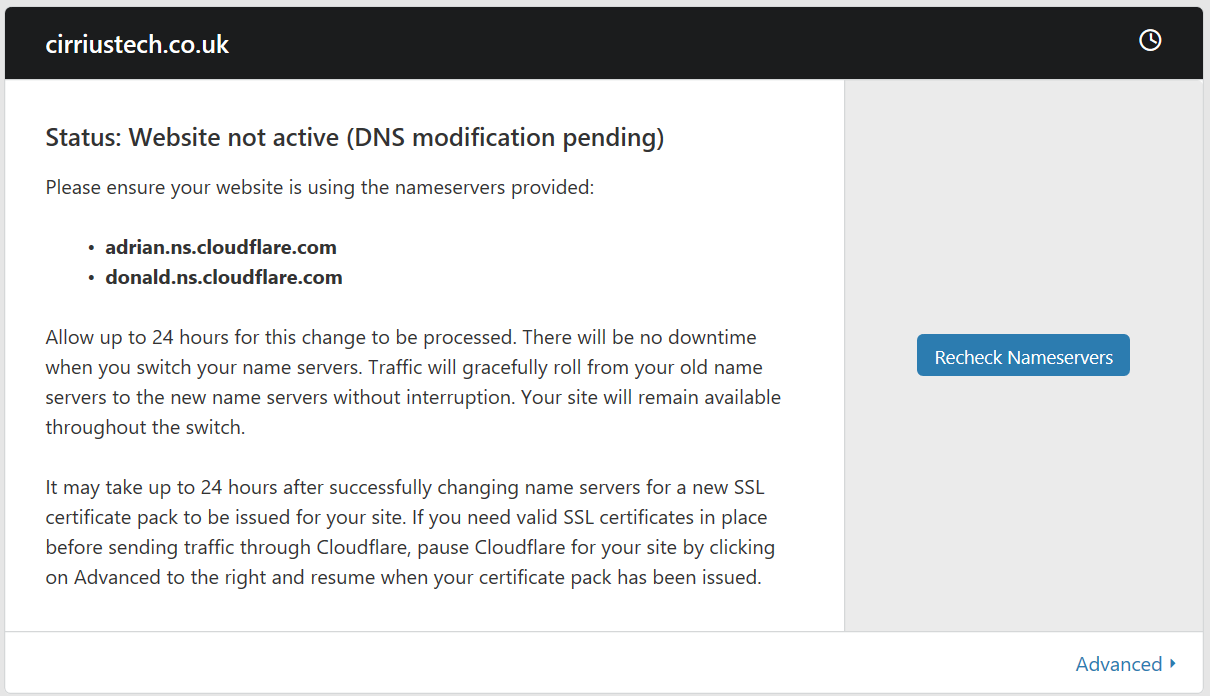
Back on cloudflare, you will see a screen like below - periodically click on Recheck Nameservers to check if the name server change has propagated.
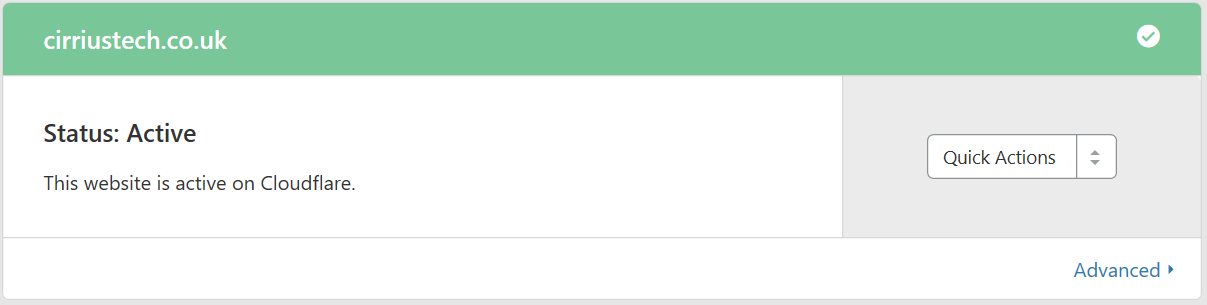
Once the name server change has propagated, you should see something similar to the following:
At the top of the dashboard, click on DNS

Add the A and TXT records required by Azure

Azure should recognise the change reasonably quickly as shown below (green is good!). Click on Add Hostname

You should now see the following whilst the change is being made:

And when completed:

And now you see confirmation the domain name is bound to the webapp:

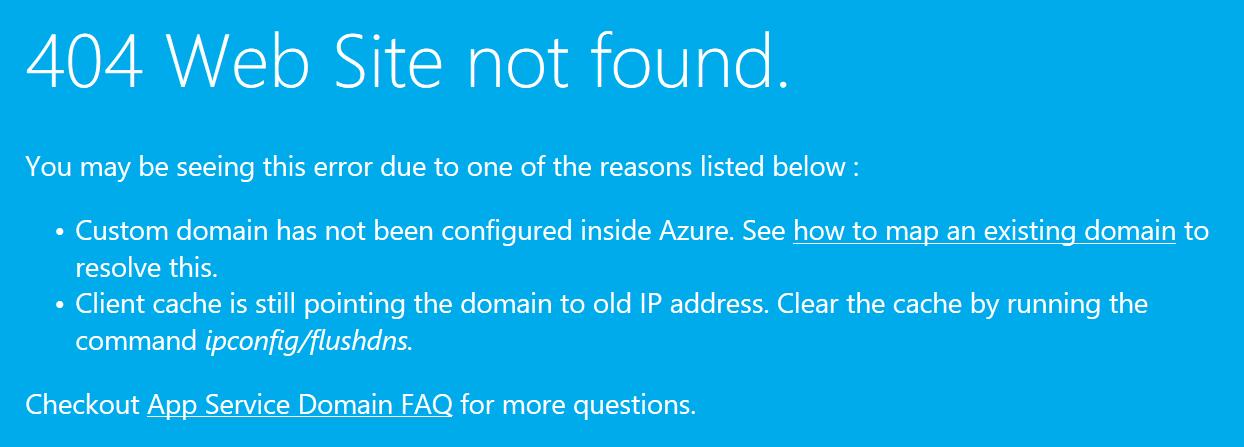
If you are still seeing the screen below when you try to access the domain, check the settings in the steps above - it’s very easy to miss something small but important.
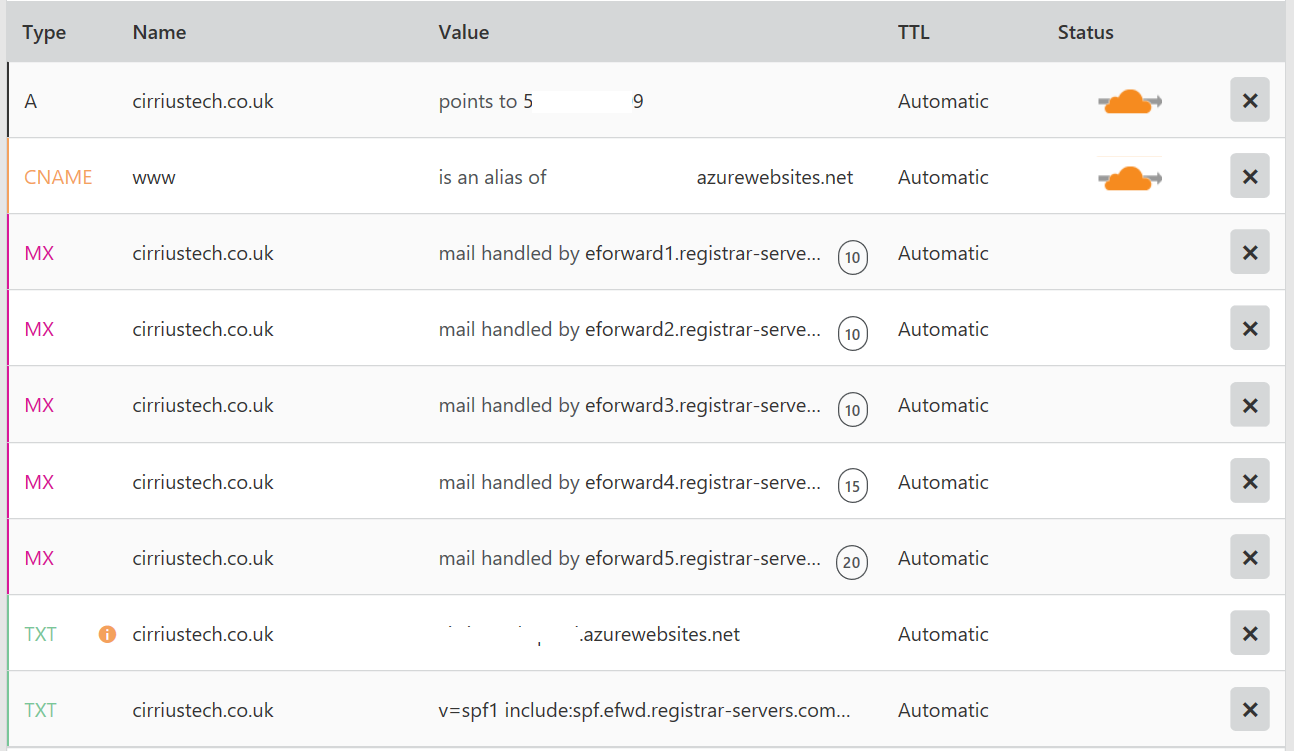
Here’s how my DNS looked in cloudflare at this point:
You now have cloudflare managing your DNS and providing DNSSEC and other enhancements, but there are many more things you may want to configure to optimise both performance and security.
I’ll cover that in the next post in this Grav in Azure series.
If you like what I do and appreciate the time and effort and expense that goes into my content you can always ![]()