Image by John Salvino on Unsplash
In this post, we’re going to create a repository in Bitbucket to host our Grav source code
What you will need
- An account in a source control repository (I’m using Bitbucket, but Github would work just as well.)
- I’m using a Windows 10 laptop - so to follow along exactly, you’ll need the same - though I’m sure most steps will work just about the same on a Mac or a Linux desktop, albeit using different desktop apps/tools.
Setting up a Grav repository in Bitbucket
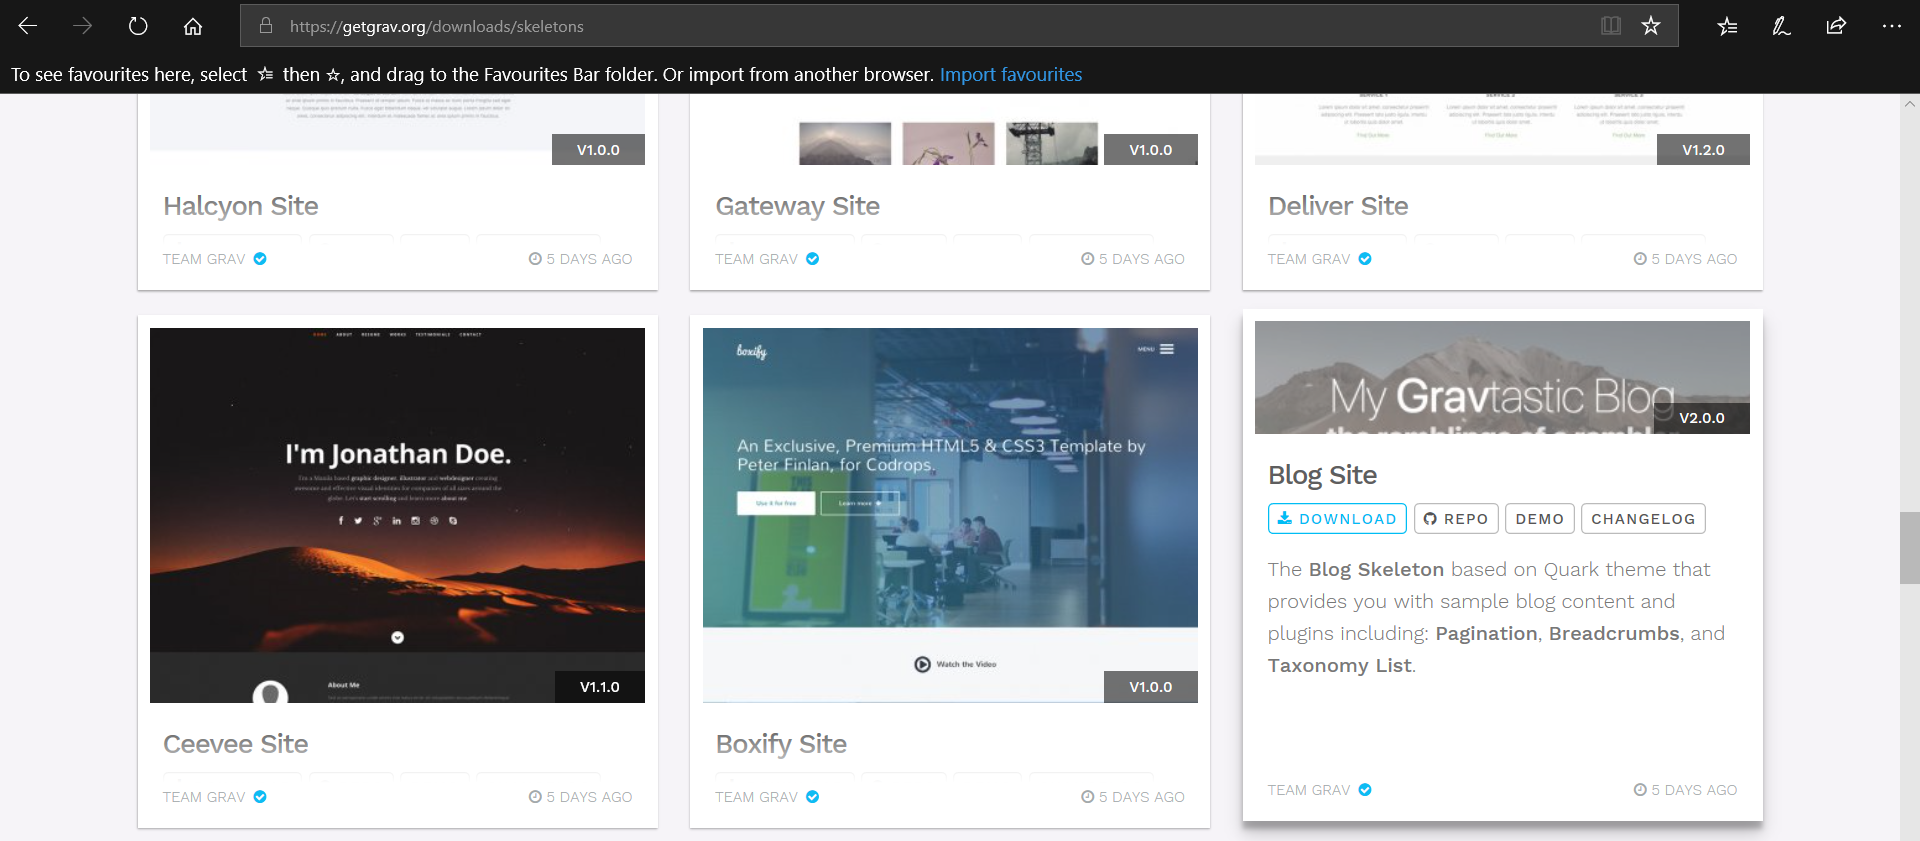
First things first, lets go to https://getgrav.org/downloads/skeletons and download the Blog Site skeleton (a skeleton is a pre-configured combination of the core grav software alongside plugins and themes to meet a particular need and get your started. As we’re going to build a blog, the Blog Site skeleton seems a good place to start):
When prompted, save the zip file:

Unzip the download to a location of your choice and you will see a number of files and folders e.g.

Now, at this point, you’ll want to create a repository in your source control - there’s many ways but for this post I’ll stick to showing you how to do it from the Bitbucket website.
Login to your bitbucket account and click on the + icon to create a new repo:
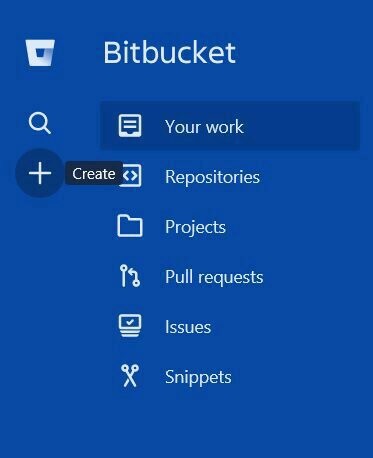
Click on Repository:

Fill out the form with a name for your repo, ensure to tick This is a private repository - unless you want your blog site source code to be open source and publicly available.

I’ve chosen Git rather than Mercurial as the Version control system, and haven’t gone into advanced settings - you can of course tweak the advanced settings if that better suits your needs.
Click Create and in a few seconds you’ll see a page similar to this, which includes instructions on how to get started and setup a local copy of the repository on your machine to edit:
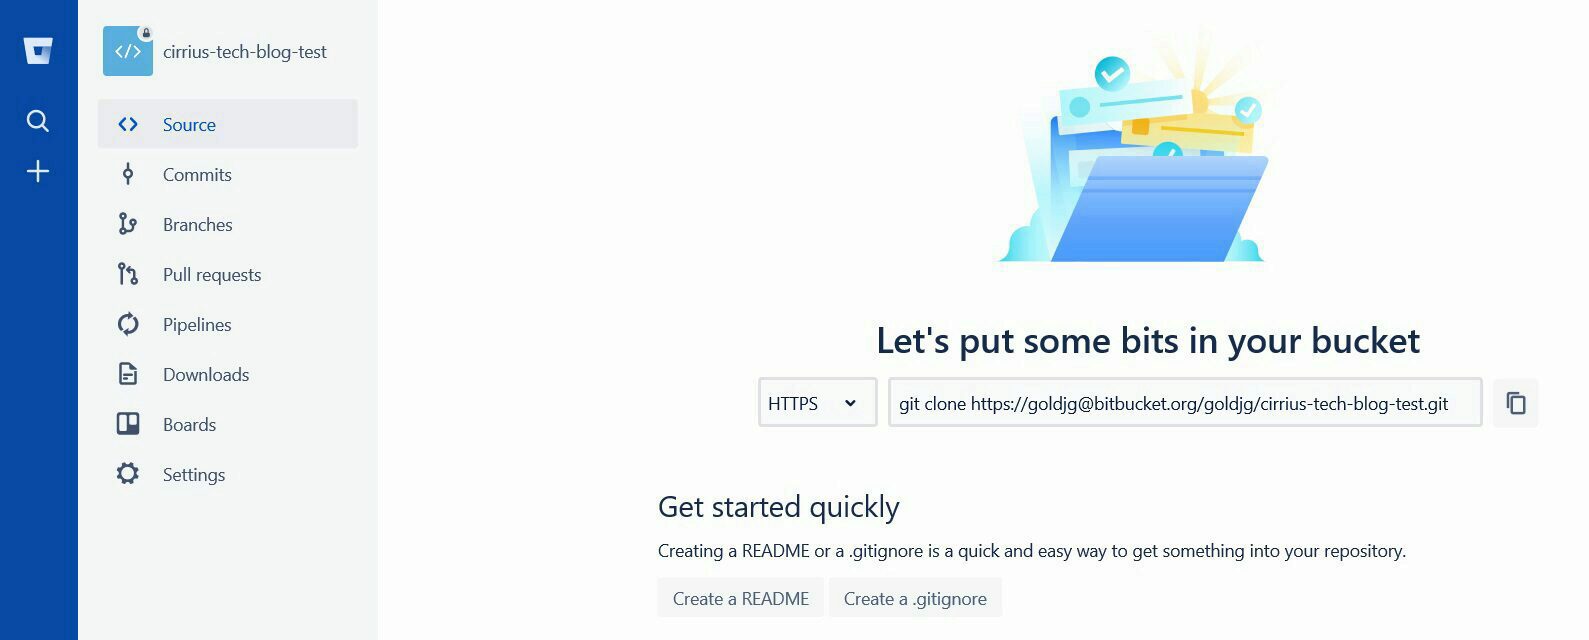
I used the Terminal in the Sourcetree app to run my git commands to setup the local repository, but there are a myriad of options to interact with Git, so you may prefer another tool/command line/shell:

- In your terminal of choice, enter
cd /path/to/your/repo - Enter
git remote add origin https://goldjg@bitbucket.org/goldjg/cirrius-tech-blog-test.git - Enter
git push -u origin master - Copy the entire unzipped skeleton contents into the local directory
- Now, to commit the local repo to the remote repo:
git initgit add .git commit -m "initial commit of full repository"git remote add origin hxxps://goldjg@bitbucket.org/goldjg/cirrius-tech-blog.gitgit push -u origin --all
In my next post, we’ll build the web app and link it to the repo we just created.
If you like what I do and appreciate the time and effort and expense that goes into my content you can always ![]()