The main idea of a Logic App is that you don’t need to be able to code - its all done graphically in the Azure portal. However, there are two views - designer and code. That means you could actually put a JSON definition of your logic app straight into the code view.
Now, having started to play with serverless apps, I next wanted to automate clearing of my Cloudflare cache when I deploy new content to my webapp and then recache content in Cloudflare so the up to date content is cached in cloudflare again.
Some research pointed me to Kudu Webhooks, one of which is a PostDeployment hook that only fires on successful deployment.
So, I know I can get a Logic app to respond to an HTTP request - which is what happens with a webhook - it calls an HTTP API when the hook event happens.
But how to then do the other stuff?
Well - as it happens, I had already built a Powershell script to do most of this, initially planning to run it as a PostDeployment job. I had also recently read about Azure Powershell Functions being available in preview - prior to that I’d have had to learn Python or Java to use Azure functions - but Powershell is something I’m already a big fan of even in my career as a mainframe systems programmer - I’ve used it extensively for automation, data parsing etc.
So, with that - I first of all set about getting my powershell script code working as an Azure Powershell Function.
Now, I’m not one for re-inventing the wheel so rather than do a big long write-up of my own on how to create a powershell function - I’ll instead direct you to the rather excellent Microsoft Docs Quickstart Guide that I followed - it’s superbly written and easy to follow - well if a mainframe techie can…!
Go ahead and follow that to create a function with an HttpTrigger - we’ll come back to it later and call it from the Logic App, and also add in the powershell code that will interact with Cloudflare’s API.
I’ll loop back to the function (and the code for it) later in the post, for now lets get the Logic App and Webhook setup.
Logic App Setup
Login to the Azure portal, search for Logic Apps in the search bar at the top of the page and click on Logic Apps
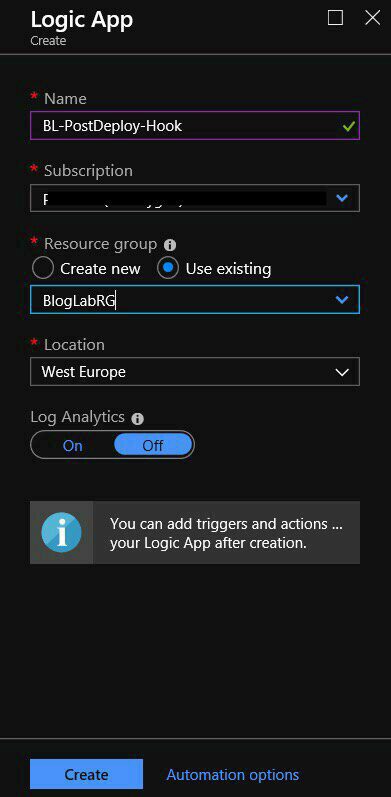
Click on Add
Complete the blade like so, using your own details where it suits - these are what I’m using as a continuation of the environment I was using in the previous post.
Click on Create
When created, go to the resource.
Within a few seconds, you’ll be notified of completion - click Go to resource on the popup, or click on your app name in the list of Logic Apps (you may have to click on Refresh first).
You’ll be taken straight into the designer view alongside a video clip and useful quickstart resources.
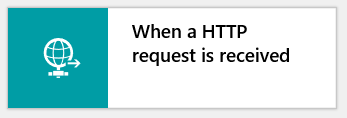
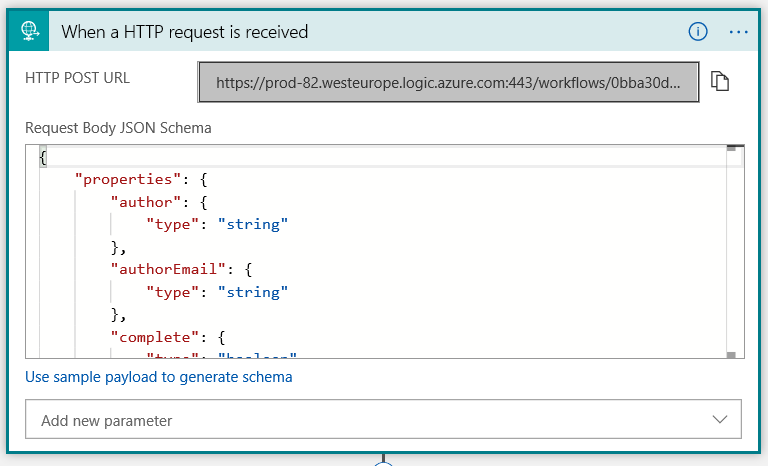
Look for HTTP triggers - in this case When a HTTP request is received
You’ll see a screen like below:
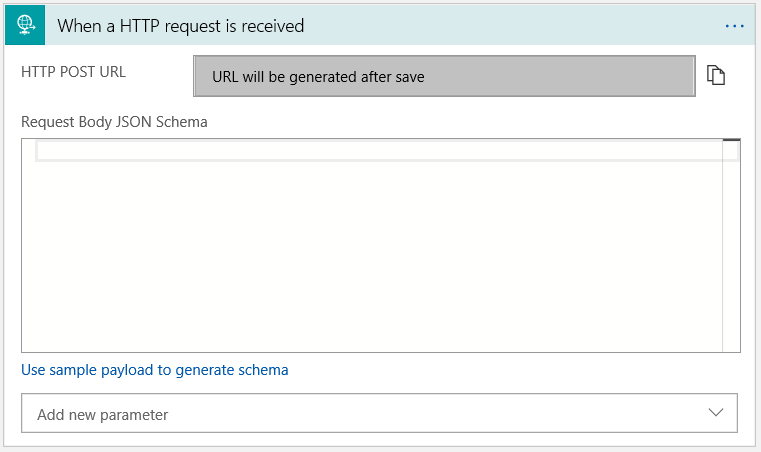
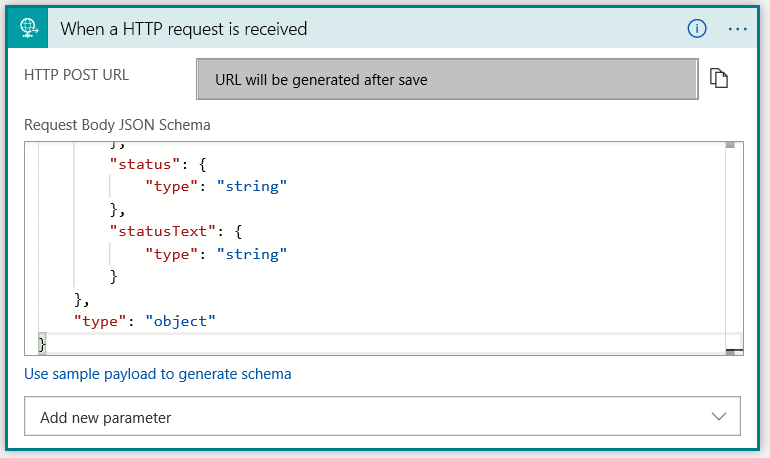
You can get the scheme by copying the sample response from the Kudu docs into the Use sample payload to generate schema dialog (click on that link in the form in the designer). Alternatively, at time of writing, the schema is as follows:
You should now have a dialog as shown below - note how it says that the HTTP POST URL will be generated once saved.
Now, you want to add an action to fire when an HTTP post triggers this flow - and what you want is Parse JSON
Use the same scheme as in step 9 - and in the Content field - from the Dynamic text, select Body as shown above.
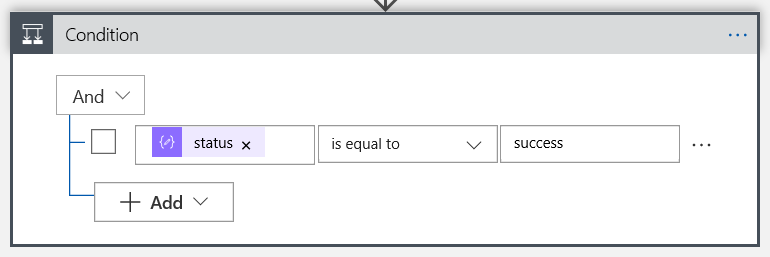
Now, add a Condition
As shown above - we want to know if the status text parsed from the JSON response is equal to success
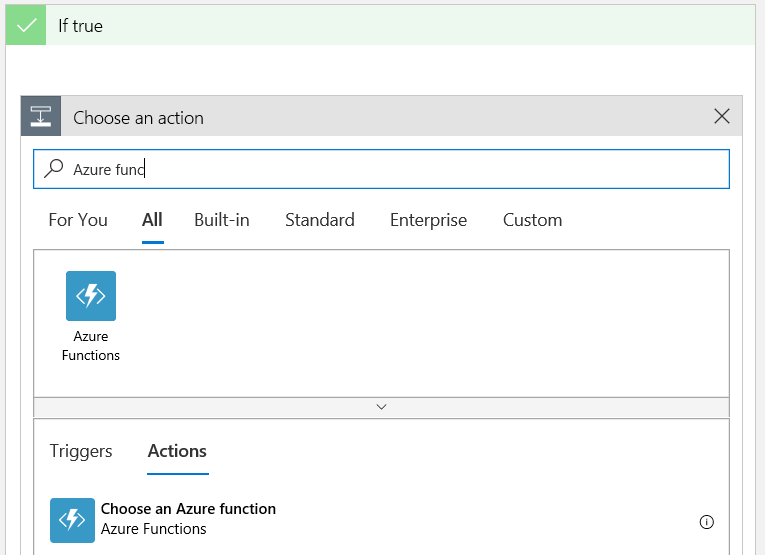
Now, if the deployment was indeed a success, what do we want to do next? Well, we want to call an Azure Function
Click on Choose an Azure function
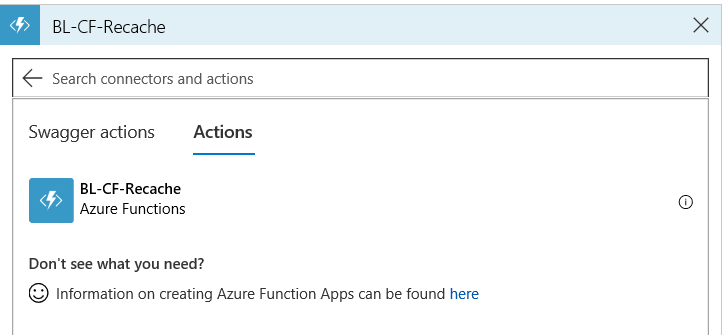
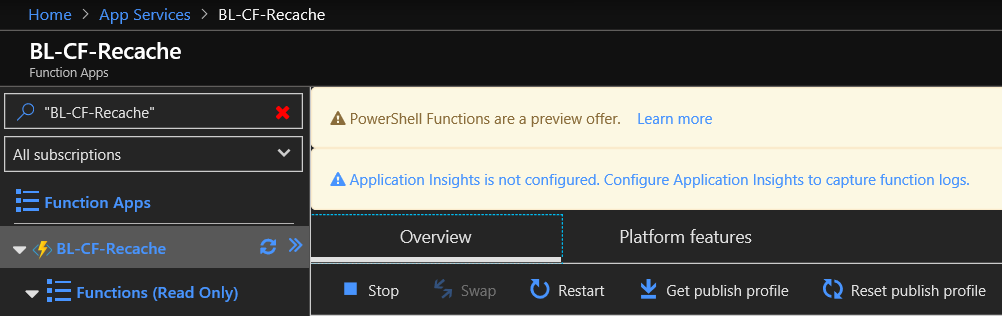
Click on the Powershell Function you created earlier following the Microsoft Docs article - I called mine BL-CF-Recache so I’ll click on that:
Now you’ll see the actions available in the function - in this case mine is named the same as the function:
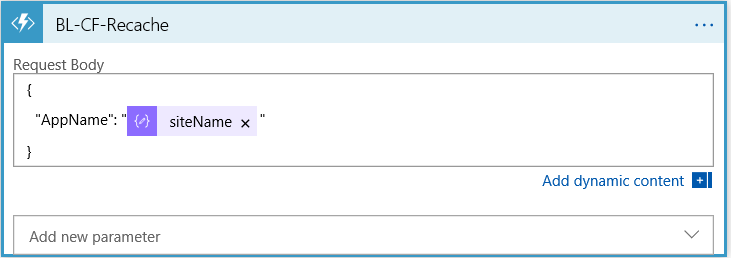
Now, for request body I’m going to use the following, because my powershell function can be used by many of my web apps and the sitename will be used in the function to dictate which site to affect in Cloudflare:
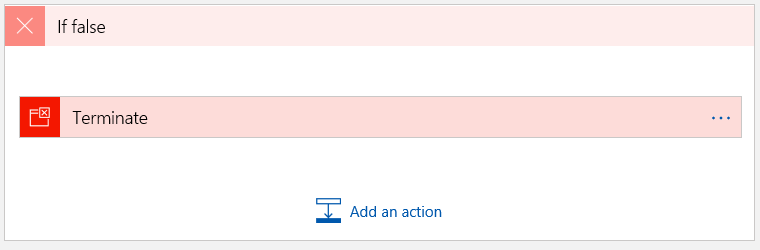
If the condition is false (status passed in from the Kudu webhook was anything other than success), we want to terminate this logic app, like so:
Now, click on Save at the top of the blade to save the app
Ok - so now we have a webapp that will run a function app on receipt of an HTTP POST from Kudu - but how do we do that?
Linking the webhook to the Logic App
This part is pretty simple - now that we’ve saved the Logic App, go back into the designer and click on When a HTTP request is received to expand the detail. You’ll notice there is now a URL for it - copy that full URL and keep it handy:
Now, lets go to our WebApp - in the case of this tutorial series, it’s called BlogLabApp.
Click on Advanced Tools in the settings blade under the Development Tools heading
Click on Go
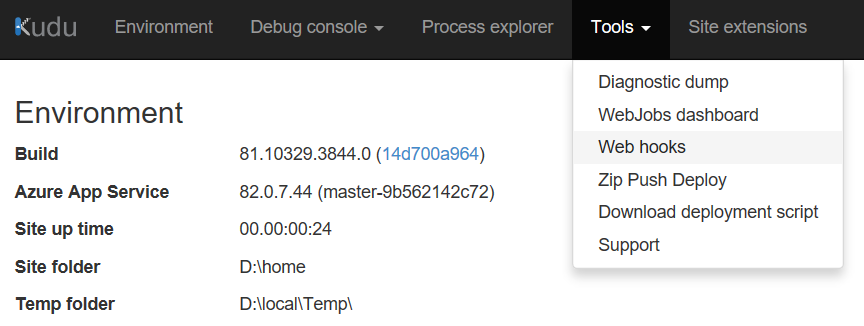
Click on Tools then click on Web hooks
Under Add Subscriber Url, paste the URL into the first field and in the next field, select PostDeployment from the dropdown menu
Click on Add Url
You should now see it has been added as below:
Ok, so now we have Kudu setup to fire off the Logic App post any successful deployment to the web app (such as a new blog post).
Now we want to add the logic we need into the Azure Function to interact with Cloudflare.
Customising the function app with our powershell code
First of all, open the function app in the portal.
Click on Platform features
Click on Identity under the Networking heading
Click on On:
Click on Save to make the change:
Click on Yes to confirm the change:
After a few seconds, you’ll get confirmation it has been enabled.
Now let’s grant the web app’s managed identity access to the KeyVault
Search for KeyVault and then click on it in the results
Click on your Key Vault.
Navigate to Settings and click on Access Policies:
Click on Add:
Click on Select principal:
Start typing the name of your function app and once it is in the results, click on it:
Once selected, click on Select:
Click in the Secret permissions field and then select Get and List from the Secret Management Operations section, then click outside of the list.
Click on OK
Click on Save to make the change:
After a few seconds, you’ll confirmation it has been enabled.
Now, you’ll need the following items stored in your KeyVault as secrets to use in the script (I have covered this in my previous posts, so won’t do it again in this one):
Cloudflare Auth Key
Cloudflare Auth Email
Cloudflare Zone Key for each zone (site) you want to interact with
For more information on the Cloudflare API - click here.
Now, if you’re using VS Code to work with your function, open up your function project and replace the entire content of run.ps1 with the code contained in my sample repository
Before you deploy it to Azure, you’ll need to change the following:
Lines 36-38 - remove as needed but for each site - change <vaultname> to your vault name, <secretname> to the name of the secret you need to retrieve for the cloudflare zone key and <secretversion> to the version identifier for that secret
Lines 47-48, as above for the secrets where you stored the Auth Key and Auth Email for cloudflare
Lines 68 and 69 - change if you would rather purge only specific resources rather than the entire cache (I’m envisioning that you might deploy a file that includes details on what to purge and have that stored by/accessed by this function - you might not always want to purge the entire cache, but as a Proof of Concept, that’s what I’m doing)
Lines 82-85 - change the URLs to match the sites you want to be able to recache the content for
Line 87 assumes your website has a sitemap.xml file at the root of the site - again change to meet your needs but if you’re using grav per my earlier blog series, you’ll have one.
You’ll no doubt see plenty room to make this proof of concept code more robust - and please feel free to do so, per the licence conditions in my repository (which are not that restrictive - just give credit if you use it/change it - don’t pass it off as all your own work).
The full sample powershell is as below:
using namespace System.Net
# Input bindings are passed in via param block.param($Request, $TriggerMetadata)
# Write-Host to the Azure Functions log stream.Write-Host "PowerShell HTTP trigger function processed a request."function GetSecret () {
Param(
[Parameter(Mandatory=$true)]
[string]
$SecretURI
)
$Headers = @{ 'Authorization' = "Bearer $AccessToken" }
$QueryUrl = "$SecretURI" + "?api-version=7.0" $KeyResponse = Invoke-RestMethod -Method GET -Uri $QueryUrl -Headers $Headers
$Secret= $keyResponse.Value
Return $Secret
}
# Interact with query parameters or the body of the request.$name = $Request.Query.AppName
if (-not $name) {
$name = $Request.Body.AppName
}
if ($name) {
$status = [HttpStatusCode]::OK;
$invalid_request =$false;
switch ($name) {
"App1" { $zone_secreturl = "https://<vaultname>.vault.azure.net/secrets/<secretname>/<secretversion>" }
"App2" { $zone_secreturl = "https://<vaultname>.vault.azure.net/secrets/<secretname>/<secretversion>" }
"App3" { $zone_secreturl = "https://<vaultname>.vault.azure.net/secrets/<secretname>/<secretversion>" }
Default {$invalid_request = $true}
}
If (-not $invalid_request) {
Write-Host "Received a valid appname: $name";
Write-Host "Gathering details for KeyVault";
$authkeyurl="https://<vaultname>.vault.azure.net/secrets/<secretname>/<secretversion>";
$authmailurl="https://<vaultname>.vault.azure.net/secrets/<secretname>/<secretversion>";
Write-Host "Enabling TLS 1.2";
[Net.ServicePointManager]::SecurityProtocol = "tls12";
Write-Output "Getting MSI Access Token" $TokenAuthURI = $Env:MSI_ENDPOINT + "?resource=https://vault.azure.net&api-version=2017-09-01" $TokenResponse = Invoke-RestMethod -Method Get -Headers @{"Secret"="$env:MSI_SECRET"} -Uri $TokenAuthURI
$AccessToken = $TokenResponse.access_token
Write-Host "Retrieving Auth Key" $authkey=GetSecret($authkeyurl)
$authmail=GetSecret($authmailurl)
$zone_id=GetSecret($zone_secreturl)
$headers = @{
'X-Auth-Key' = "$authkey"'X-Auth-Email' = "$authmail"'Content-Type' = "application/json" }
$apicmd = "purge_cache";
$apibody = '{"purge_everything":true}';
$uri="https://api.cloudflare.com/client/v4/zones/$zone_id/$apicmd";
$cfout=Invoke-RestMethod -UserAgent "AzRebuild_CF_Cache 1.0" `
-uri $uri `
-Method POST -Headers $headers -Body $apibody;
Write-Host "Cloudflare purge request status`r`n$cfout`r`n";
If ($cfout.success -eq"true"){
Write-Host "Downloading sitemap"switch ($name) {
"App1" { $sitemap_domain = "https://App1.co.uk"; }
"App2" { $sitemap_domain = "https://App2.com" }
"App3" { $sitemap_domain = "https://App3.info" }
}
$xml=Invoke-RestMethod "$sitemap_domain/sitemap.xml" -UseBasicParsing;
Write-Host "Parsing sitemap URLs for $sitemap_domain" $xml.urlset.url.loc|ForEach-Object {Write-Host "Touching $_ to recache"; `
$out=invoke-webrequest $_ -UseBasicParsing -UserAgent "AzRecache";
Write-Host "StatusCode:" $out.StatusCode;
Write-Host "StatusDescription:" $out.StatusDescription;
Write-Host "`r`n";
}
}
else {
$Body="Unable to connect to Cloudflare, aborted run.";
$status=[HttpStatusCode]::BadRequest
}
}
else {
$Body="Invalid Application";
$status=[HttpStatusCode]::BadRequest
}
} else {
$status = [HttpStatusCode]::BadRequest
$body = "Please pass a name on the query string or in the request body."}
# Associate values to output bindings by calling 'Push-OutputBinding'.Push-OutputBinding -Name Response -Value ([HttpResponseContext]@{
StatusCode = $status
Body = $body
})
Summary
So, without too much effort, we have an automated workflow so that when I deploy new website content, the cloudflare cache for the site is automatically purged and then re-cached. I’m sure you can see great potential to combine Logic Apps and Azure Functions for your application logic or automation needs - and if you’re used to Powershell and come from a sysadmin background, you can get started without learning a new language - result!
As ever, thanks for reading and feel free to leave comments below.
If you like what I do and appreciate the time and effort and expense that goes into my content you can always